An altered puzzle is where take a puzzle, and give the pieces a make over using your own style and interests. Everyone's puzzle will be as unique as each piece of a puzzle. Here is what my finished product looked like.

As you can see, i just used scrapbook paper to do this. But I'm thinking I want to make one with pictures of friends and/or family. I think that would look super cool. But we'll see...
So, are you ready to give it a try?? Here's what you'll need:
1 Puzzle (you'll probably want 24 piece, or 16 if you can find one)
Scrapbook Paper - lots of different designs/patterns
Modpodge/Rubber Cement/ some good glue
Scissors - regular size and small size for ease
Embellishments - whatever kind you want!!
Optional: you might want an exact knife or a rotary tool or something similar to help trim off excess paper. but i found a way to not need one, i'll tell you how below.
Got everything?? Great!! Let's get started!!
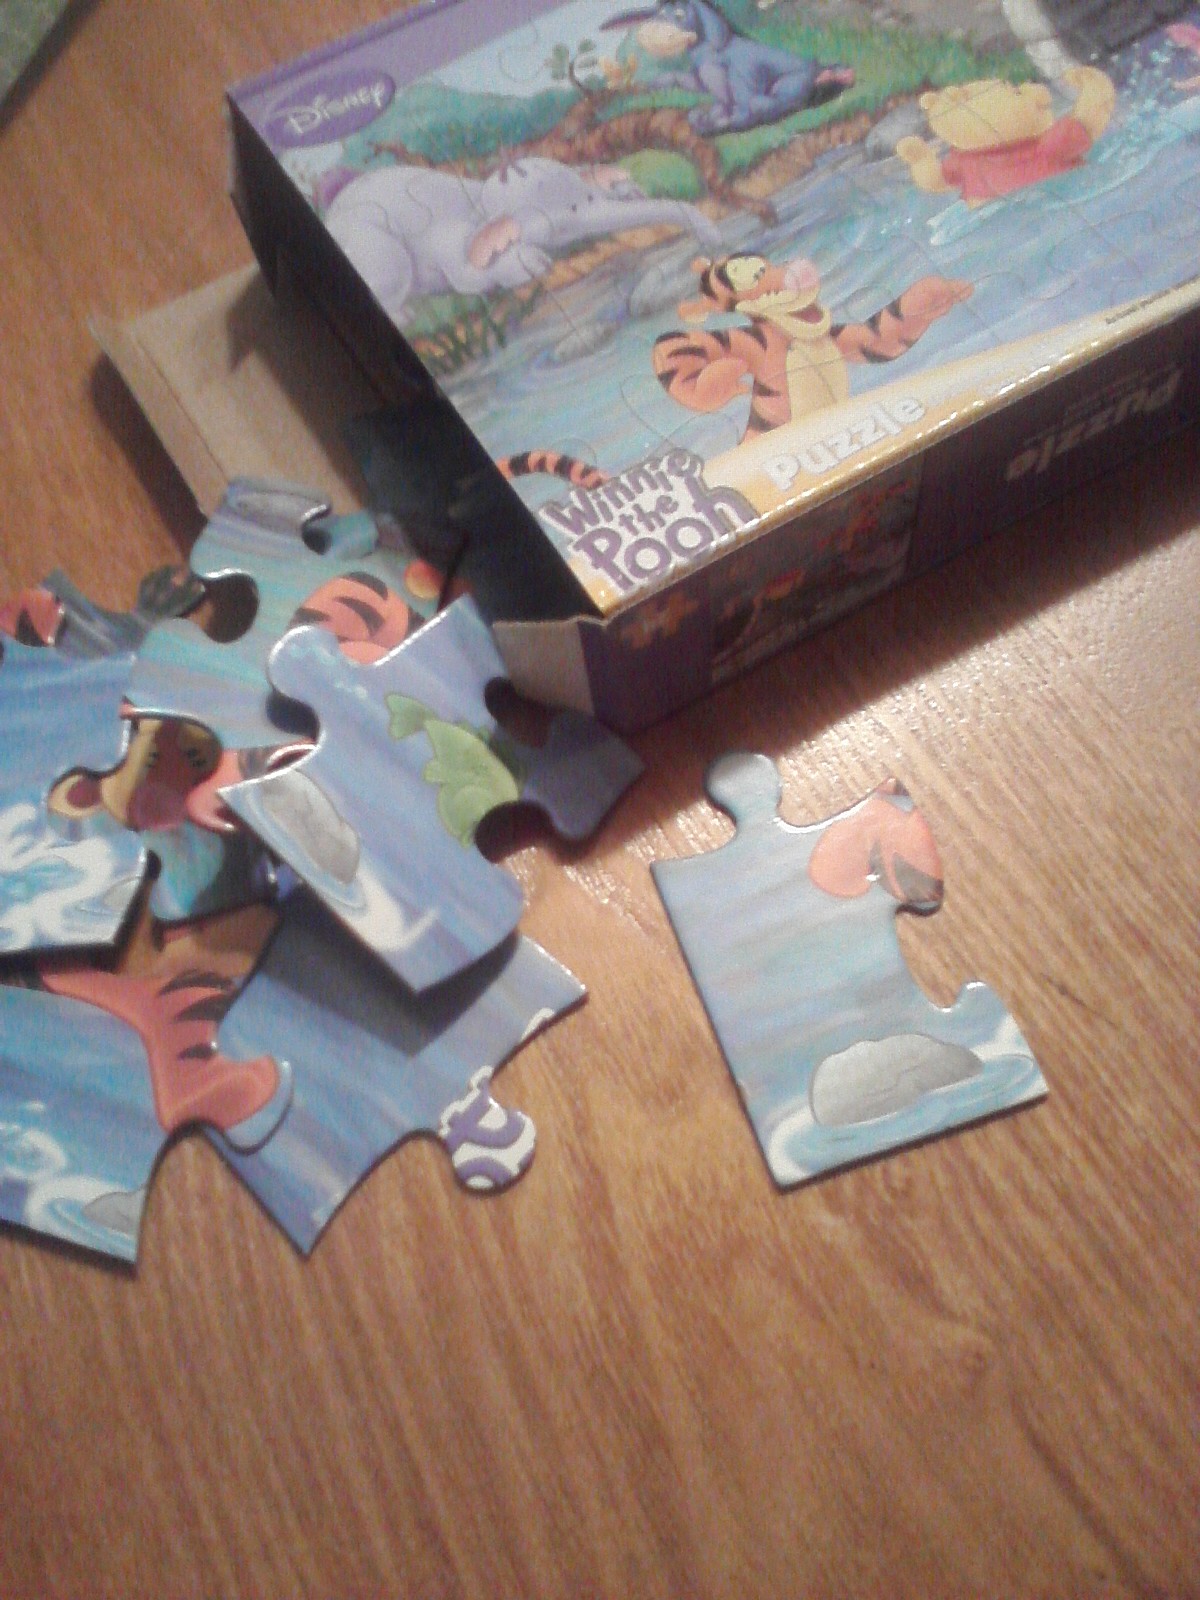
Step 1: Get your puzzle. You can get 24 piece puzzles at the Dollar Store. I got a Winnie the Pooh one. You want 24 or 16 if you can find one because you need you pieces to be big enough to work with.
Go ahead and put the puzzle together. Then flip it over and number the pieces. This will help you later when you've covered up the picture and the pieces don't fit as well because of the paper. With numbers you'll know it's in the right place.
Step 2: Time to cover every piece with scrapbook paper. I chose to make sure every piece was different, but feel free to use duplicate patterns. It's hard to find 24 different designs that all match... that's another thing, i tried to color coordinate mine, you can do yours however you want!
When cover your puzzle piece, it is very important that your paper is precisely the same size as the piece. If it's too small, you'll see the picture peeking out from the sides. If it's too big, it will hang off and make the piece not fit together because the excess paper will be in the way. So here is my trick.
First, go ahead and trace your piece onto paper. If you trace it on the back side, make sure you flip the piece over too or else you'll end up with a mirror image instead of an exact image.

Time to trim it up and make sure there is no excess. By trial and error, I found that it is NOT a good idea to go ahead and glue it on and then try to trim it down to the right size. Line the paper up on the puzzle piece as best you can, make sure the whole front it covered. Then look at it from the backside. If you see ANY paper extending past the puzzle piece, even the tiniest little bit, TRIM IT OFF. You may think that less that an millimeter shouldn't make a difference, but you would be surprised. I know it's hard to get into the curves, but do your best. Be careful not to trim off too much!!
Step 3: Glue the paper onto the piece, line it up as perfectly as possible... Do this for all your puzzle pieces. It should look like this now, except you don't have to have it put together. The reason mine is, is because I kept it together as I covered the pieces to make sure the adjacent pieces matched each other and i didn't have any clashing paper.

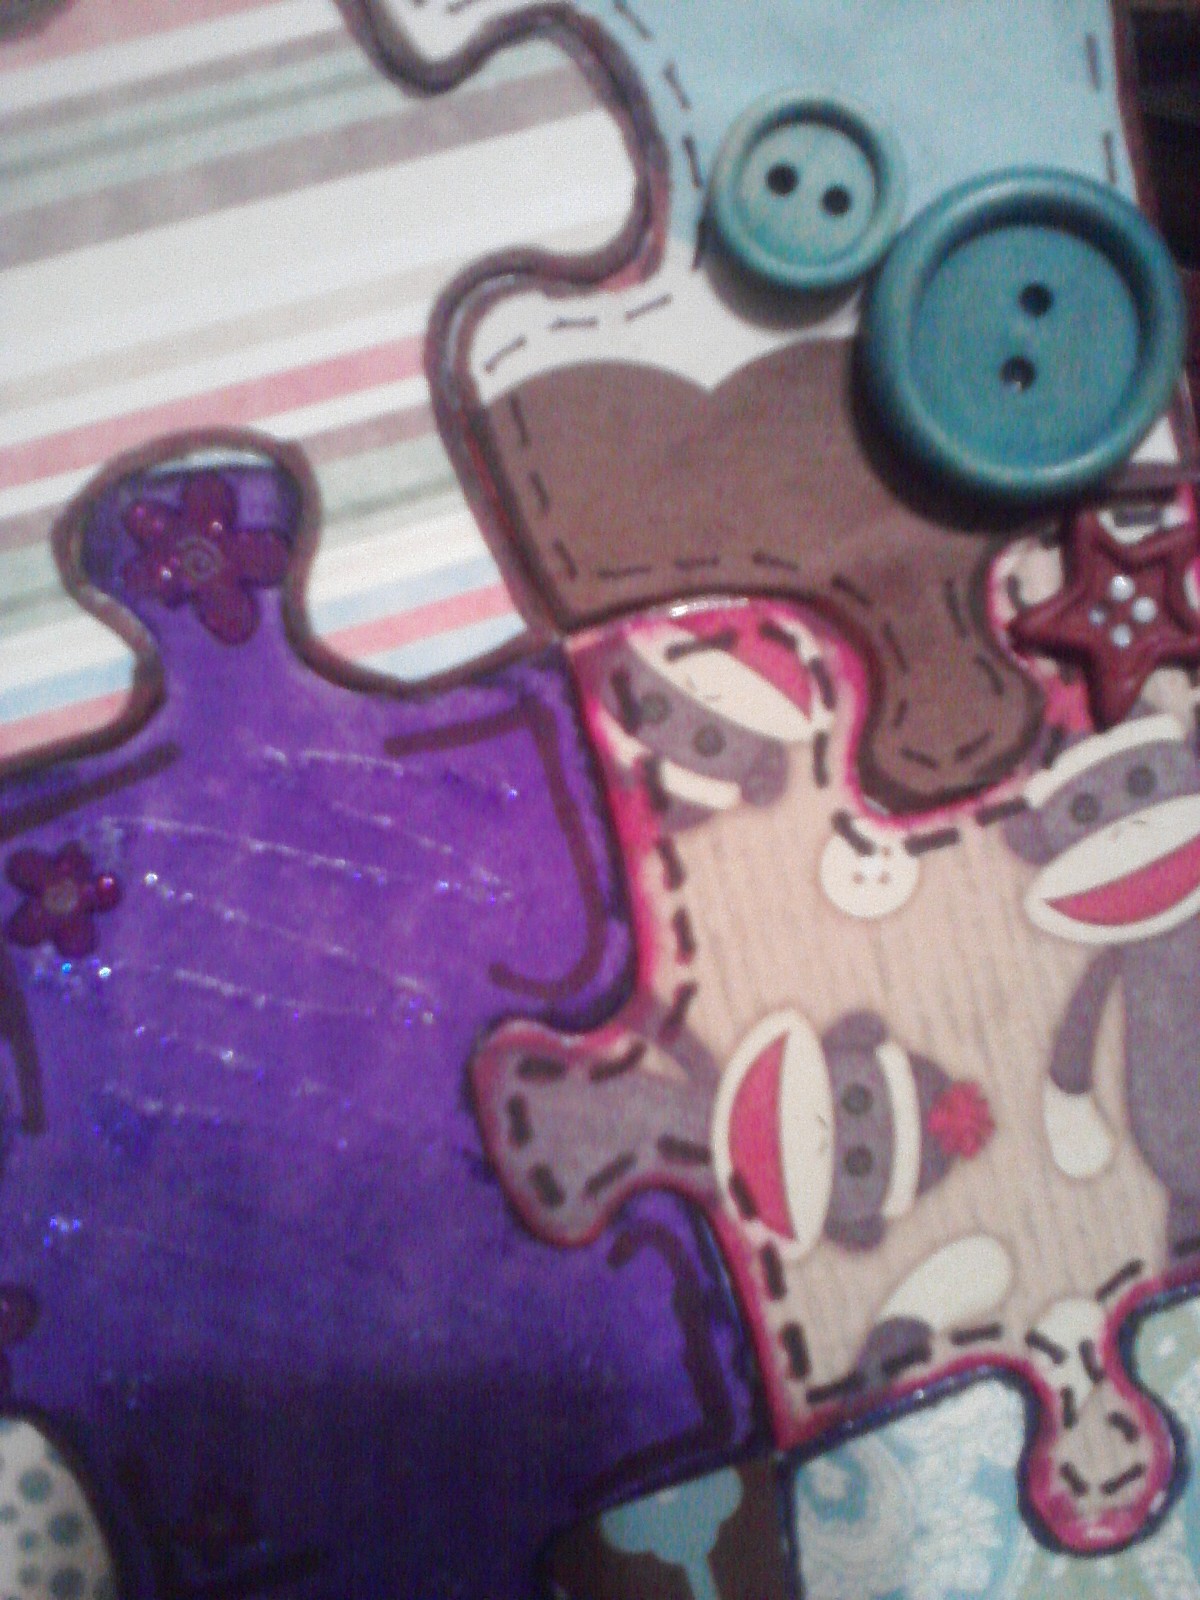
Step 4: Time to decorate!!! Here you get to add a little something extra to your piece. Use your imagination and be creative. Don't be afraid to use inspiration from my puzzle or other puzzles that you can see if you google "altered puzzle." That's what I did.
I used glitter glue, rub on stickers, brads, stamp ink with Q-tips to ink some of the edges, sharpies,
buttons, little metal things i found at the HobLob, a wax stick thats shapeable, letter diecuts, and my
cricut to get the '2012'.
You could also use paint, glitter, stencils... anything really. Just see what you have laying around/
Step 5: Once all your pieces have dried completely, start piecing it back together. You might be glad for those numbers on the back now ;). The pieces will be stubborn and won't want to go together. Remember that puzzle rule "Never force a piece into place"? ignore it. Force it in. Use a little force by not too much. Don't tear or bend the pieces. Get it is as flat as possible.
Step 6: This step is really dependent on what you're doing with your puzzle. I don't know yet if i want to frame mine or just hang it up. So I smeared the back with Modpodge and put a piece of paper over the back to make sure it wouldn't fall apart if i decide to move it.
If i decide to hang it up, i think i want to find a ribbon that matches and glue each end to a corner on the back and hang it like that... or i might frame it... not sure yet. havent decided.
Anyway... There you go, and altered puzzle. It take quite a bit of time and patience. The tracing, cutting, and trimming part is rather tedious. But who doesn't enjoy a good challenge???
Here are some close ups of some of my pieces so you can see them better.
Let me know what you think!!


No comments:
Post a Comment