Don't forget to check out favorite blog posts on the Gallery Tabs!!!
Showing posts with label paint. Show all posts
Wednesday, March 26, 2014
1 Peter 2:24 - Scripture Doodle
Here's another one!!!! This one is 12x24. I ventures away from the standard 11x14 and 16x20 rectangles, haha.
Labels:
canvas,
paint,
painting,
scripture doodle,
wall art
Tuesday, March 25, 2014
Romans 14:19 - Scripture Doodle
I wanted to do a quick, simple scripture doodle, and splattering paint sounded like fun. And so, I give you a quick, simple, paint splattered scripture doodle.
I felt like adding a bit of shimmer and sparkle after i finished, so you might be able to see it a little in this picture.
Labels:
canvas,
paint,
painting,
scripture doodle,
wall art
Monday, March 24, 2014
Psalm 13:5-6 - Scripture Doodle
Well, here's another one! I've been wanting to do a music note themed scripture doodle for quite some time now but I had been having trouble finding a good verse that I wanted to do. Not too long ago I'd asked my Centrikid Camp friends what some of their favorite Bible verses were, hoping one would really jump out at me and I'd get an idea for a scripture doodle. There were 2 actually. The first was the Galations 12:20 one. And this was the other, Psalm 13: 5-6, plus I got to finally use a music note theme :). So it was a win-win.
Sorry the picture is a little crooked, I was trying to keep my shadow out of it, but it looks like it creeped in anyway, lol. See there on the left? Haha. Oh well.
And you can't see it in the picture, but I painted the edges of the canvas each one of the 4 colors of the words (pink, blue, purple, and green).
Here's an artistic-ish photo, just in case you wanted one :) ... is it blurry? I think it might be. Eh, whatever.
Sorry the picture is a little crooked, I was trying to keep my shadow out of it, but it looks like it creeped in anyway, lol. See there on the left? Haha. Oh well.
And you can't see it in the picture, but I painted the edges of the canvas each one of the 4 colors of the words (pink, blue, purple, and green).
Here's an artistic-ish photo, just in case you wanted one :) ... is it blurry? I think it might be. Eh, whatever.
Labels:
canvas,
paint,
painting,
scripture doodle,
wall art
Tuesday, February 18, 2014
Scripture Doodle - Psalm 103:12
I've completed yet another #scripturedoodle. This on is Psalm 103:12 - As far as the east is from the west, so far has he removed our transgressions from us.
Here are some pictures at different angles for you. It has a grunge effect to it, and I'm not sure if you can see it in the pictures, but there is some glitter on the background.
Sunday, February 16, 2014
Let Us Rejoice - Psalm 118:24
My grandmother saw some of my other Scripture Doodles and she liked them. So she asked me to paint her one for this big empty wall in the bathroom of the new house they just bought. This is my first custom made order Scripture Doodle. She wanted the verse Psalm 118:24, "This is the day the Lord has made, let us rejoice and be glad in it." And she wanted a landscape with a sun.
So I went online, did some googling found, found a landscape I liked, and went for it.
However, I think I will stay away from landscapes. I'm not very good at them.
I put some glitter paint over the sun and some shimmer paint in the river. Then I tried to add some wild flowers and cattails, but they look kind of crappy. Oh well, I think she'll like it anyway, I am her granddaughter after all ;), that has to count for something.
So I went online, did some googling found, found a landscape I liked, and went for it.
However, I think I will stay away from landscapes. I'm not very good at them.
I put some glitter paint over the sun and some shimmer paint in the river. Then I tried to add some wild flowers and cattails, but they look kind of crappy. Oh well, I think she'll like it anyway, I am her granddaughter after all ;), that has to count for something.
Labels:
canvas,
paint,
painting,
scripture doodle,
wall art
Saturday, January 11, 2014
Owl Always Love My Family
My sister gave me a set of 9 4x4 canvas blocks. So I had a new split canvas challenge. This is what I came up with, I hope you like it :) I've really been wanting to do a painting with owls, so when I thought of this, I got really excited! (P.S. hanging instructions further down.)
This is it all pushed together just so you can see the painting a little better in case the pictures makes it hard to see.
This is it with spaces in between each block, which is how it will be hung. It's just sitting on the floor right now.
This is my artistic photo :)
This shows how the edges of each block are painted a different color just to add to the whimsical look and feel of it. (Turquoise, dark purple, burnt red, saffron yellow, light green, burnt orange, light pink, light purple, aqua)
- I didn't want to have to hang 9 individual canvases. 1. because then i have 9 holes in my wall. 2. it would take forever to get them all lined up. and 3. if i ever wanted to move them somewhere else, i have try to rehang 9 different canvases and try to get them all lines up.
- SO, in order to avoid this, I used a strip of aluminum metal (not foil) and stabled it down the backs of each column. MAKE SURE EACH ROW IT SPACED EVENLY SO THEY WILL HANG LINED UP.
- The reason I used aluminum is because I first tried ribbon, which mostly worked, but then when you try to hang it, the bottom one tilts out too much, and I didn't like how it looked. So I needed something stiffer. So my dad had some aluminum strips he used for trim on the outside of our house. It worked perfectly.
- Then we drilled holes in the top of the strips so we could hang them.
And here it is hung on the wall.
Sunday, October 21, 2012
Disney Character Canvas Collection
Back in August I posted a blog on the Mickey canvas I made combining a few different techniques I've seen on Pinterest. I made a whole collection of them, making one for each of the 6 main Disney Characters (Mickey, Minnie, Donald, Daisy, Goofy, and Pluto). I realized I never posted pictures of the others, so here they are. If you want to know how to make them, click here.
(Goofy has a bit of an Orange tint when i took the picture. not sure why)
Here is where I hung them up in the game/craft room at my house.
Labels:
altered art,
canvas,
Disney,
diy,
mixed media,
paint,
painting,
wall art
Sunday, August 12, 2012
Mickey Character Canvas
So I'm kind of an a Disney spur right now, in case you can't tell. And I love Mickey Mouse. And I had this canvas laying around that I haven't used, so I decided to make a Mickey Mouse Canvas. I sort of came up with this idea by combining several things I've seen. I'm sure someone else somewhere in the world has done this before, but I haven't seen it, so I just sort of had to experiment, not really knowing how it would turn out. So there are some flaws that I now know to look out for if I decided to make any more of these.
Here is what my finished project looks like, and the step by step details are below:
Supplies:
Canvas
Comic book pages/comic strips/newspaper
paint and brush
water color paints
modpodge/clear acrylic sealer spray
temporary adhesive
scissors
Step 1: Find your comics or newspaper. Either will be fine, but since I did a cartoon character, I thought it would look really cool if I found comics of that character. So I just looked online and googled it and found some and printed them out.
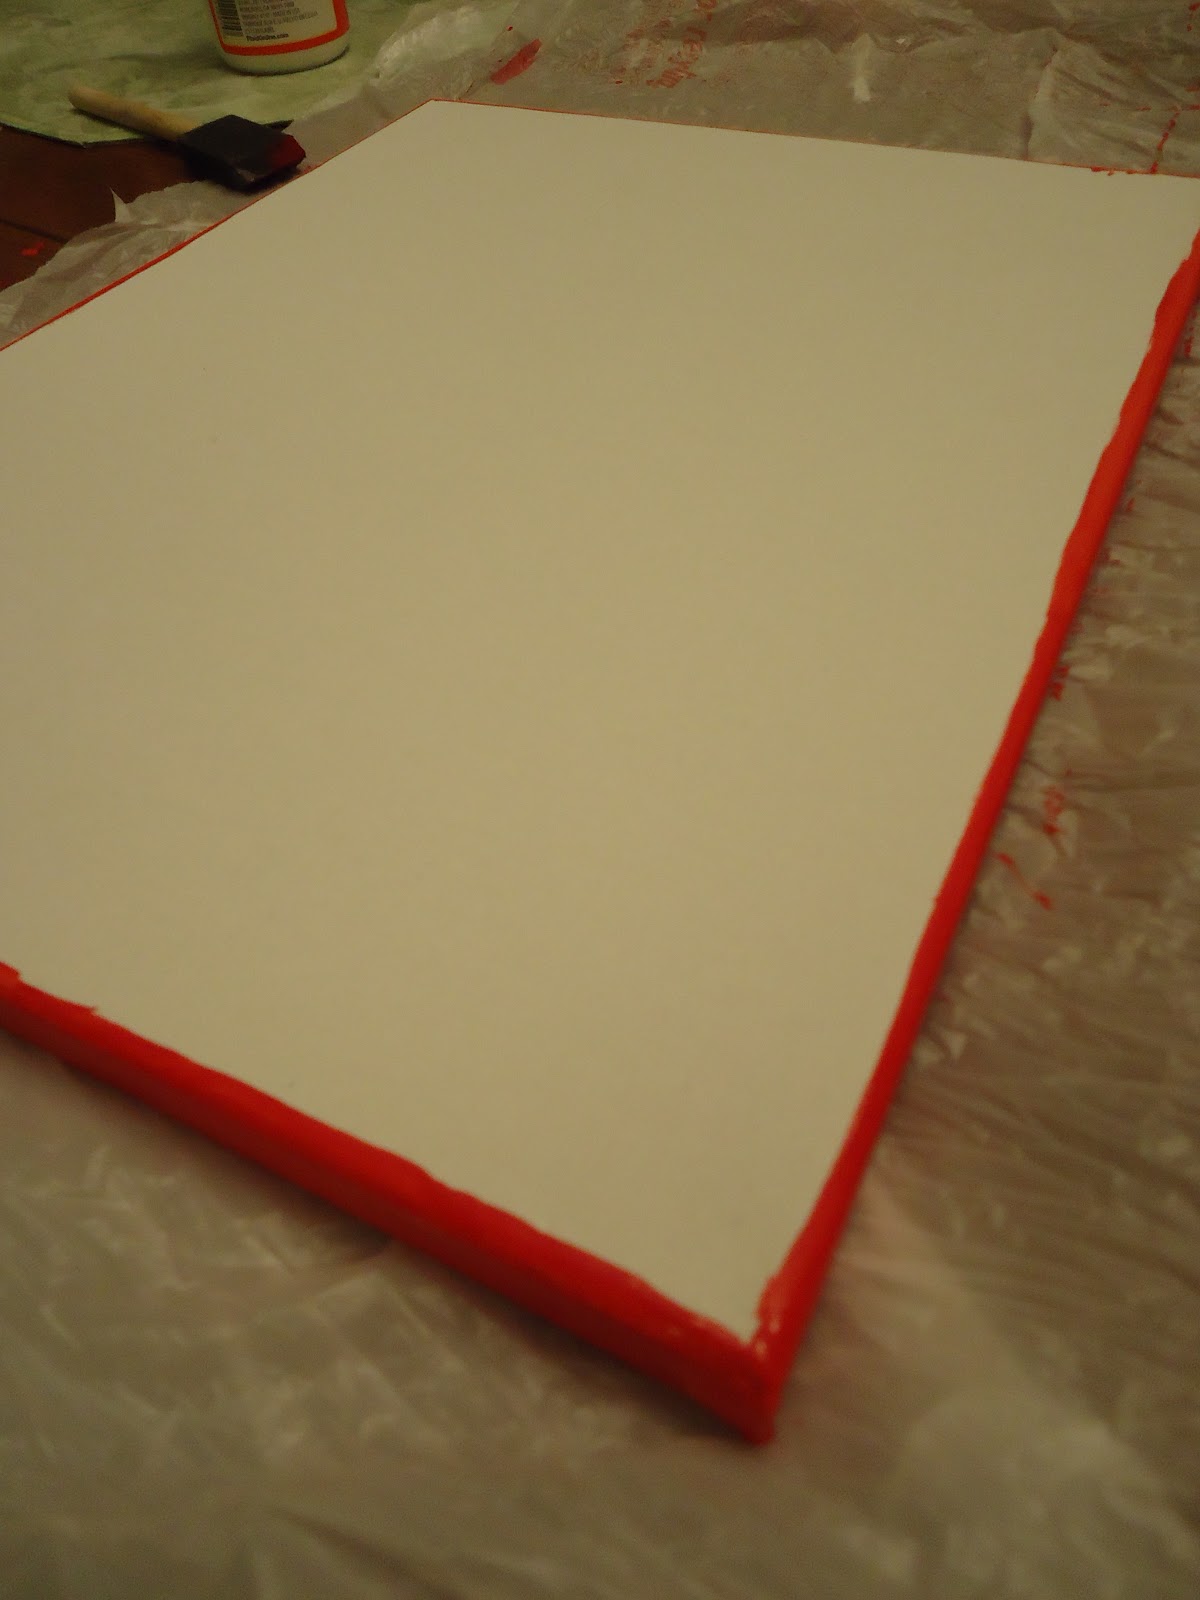
Step 2: Choose a coordinating color that matches your character and paint the edges of your canvas, and a small border on top. Red is very closely associated with Mickey, so I chose red. In this picture there isn't really much or a border on top, but like i said, I was experimenting, and I realized later I needed more of a border, so it got added after the picture was taken... probably 1/2 inch should be fine.
Step 3: Glue down the comics/newspaper. Make sure all the edges are glued down well and there are no wrinkles. I didn't make sure all the corners were glued down so after I painted they started curling up. So you're gonna wanna make sure that it's glued down well.
*****I found out that my plans of modpodging over the whole thing when I was finished wouldn't work because the ink from the paper mixed with the modpodge and left a blue haze over the comics. So I suggest testing it out in a corner first to make sure this won't happen before you modpodge your entire canvas. It doesn't show up as much in the picture as it does in person, but I just wanted to give you a heads up.
Step 4: Find the character that you want and print out 2 copies, and cut one out. You'll need the second copy later. Make sure it's the right size you want. I ended up blowing Mickey up so that he was on 2 pages because he wasn't big enough on just the one page.
Step 5: I used this ZIG glue pen (in picture), but if you have any temporary adhesive you'll want to use that. You need to put the adhesive on the back of your character, make sure you get all the edges very well, especially at inverted and exverted corners, and any small skinny parts sticking off the main character (like Mickey's tail). If you don't, I have pictures below of what might happen that you'll want to avoid.
For this glue, it's very wet when you apply it, but if you let it dry for about 10 minutes, it's becomes tacky enough to keep the paper in place, but isn't too sticky and can be pulled up later with out any problem.
Step 6: Position your character on the canvas and make sure all the edges are stuck down well. Then use black paint (or if you want to use another color) to paint your canvas. On the edges of your character, make sure that you stroke from the middle out, so that you don't accidentally push any excess paint up under the edge. We want crisp edges.
Once the whole canvas is painted, allow it to dry, and then peel off your character. It should look like this!!
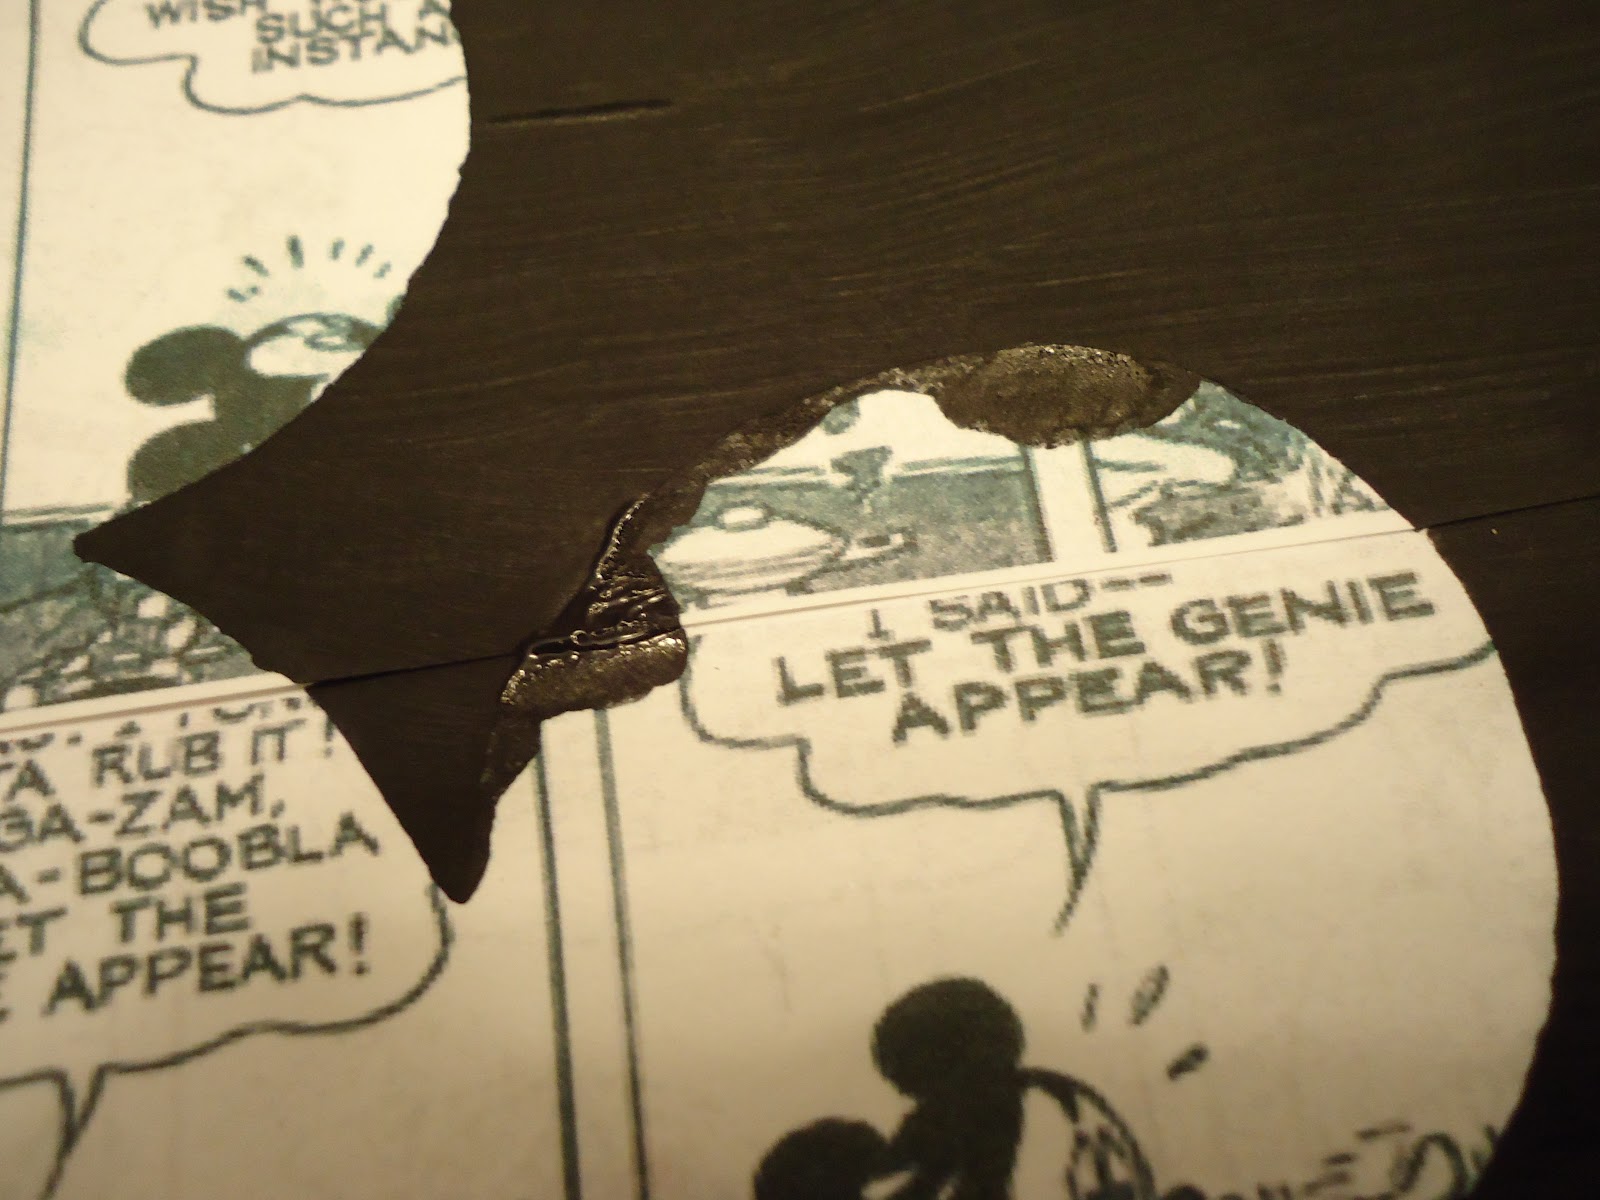
******Here are the pictures of what will happen if the edges aren't glues down good enough or if your brush strokes go from the canvas onto the character, rather from the character onto the canvas.
So watch out for that!!
Step 7: Time to fill in the lines to define your character. Here is where you need the 2nd copy, unless you're are really good at free handing or are very artistic, you might need to use the light..But otherwise You also need a very bright light/lamp to put behind the canvas. Line up the paper with the painted outline, and I used sharpie pen to trace the lines. You can use pencil or pen or whatever. Try to be accurate. Then go back and paint over it.
So you should have something like this now.
Step 8: I decided that i wanted to add a little color, so I used water color paints to color it in, that way the comics can still be seen.
Stap 9: And then since I wasn't able to modpodge it, I used clear acrylic sealer spray to coat it to give that finished glossy look :)
Let it dry and you're done!!
Too see all the characters I made, click here. (Other Characters are Minnie, Donald, Daisy, Pluto and Goofy)
Labels:
altered art,
canvas,
Disney,
diy,
mixed media,
paint,
painting,
wall art
Subscribe to:
Posts (Atom)