Showing posts with label picture frame. Show all posts

Tuesday, March 4, 2014

Gift for Grandma - Count Your Blessings

This craft was inspired by a project I saw somewhere else. I adapted it to the materials I had on hand and what I could get easily or affordable. This is a failry simple gift to make that is perfect for mom's and grandma's. A mother's most joyous blessing is her children, and this gives her a way to proudly show off just how many she has.

I made two of these. One for my mom when she got her first grandchild, and one for my Meemaw. It's a home made pallet wood frame that my dad helped me make. It has routed edges to dress it up a little, and I stained it.

And then, this is where you can tell I'm a broke college kid. I took a cereal box and cut out the wide side panels, one for each frame, large enough to cover the opening of the frame. I then chose my scrapbook paper and glued it to the cereal box, and then I hot glued the cereal box to the back of the frame. So fancy. Just don't look at the back, haha.

I used my Cricut to cut out my words, and some glitter glue to dress it up. I purchased some chalkboard vinyl with an adhesive backing for the 3 panels. I purchased a box of chalk, and fashioned a chalk holder with a piece of paper and magnet to attach it to the back of the frame to always have chalk nearby.

 Then I just went to Michael's to get some plate stands to display it!


 Here is a picture of the cereal box backing. Obviously the printed side is on the inside, covered up by the scrapbook paper. And the black square is the magnet where the chalk attaches.

Saturday, March 23, 2013

Craft Night!!!

Sometimes it's good to just stay in and have a craft night with a few friends.  So that's what me and two of my friends did.

Our projects vary from time to time. A lot of the canvases that I've posted have been a result of a craft night. This time, our project was inspired by Michaels, the craft store. My best friend was there and saw some cute wooden frames and little wooden shapes that you can pick out and paint and glue on. So that's what we did....

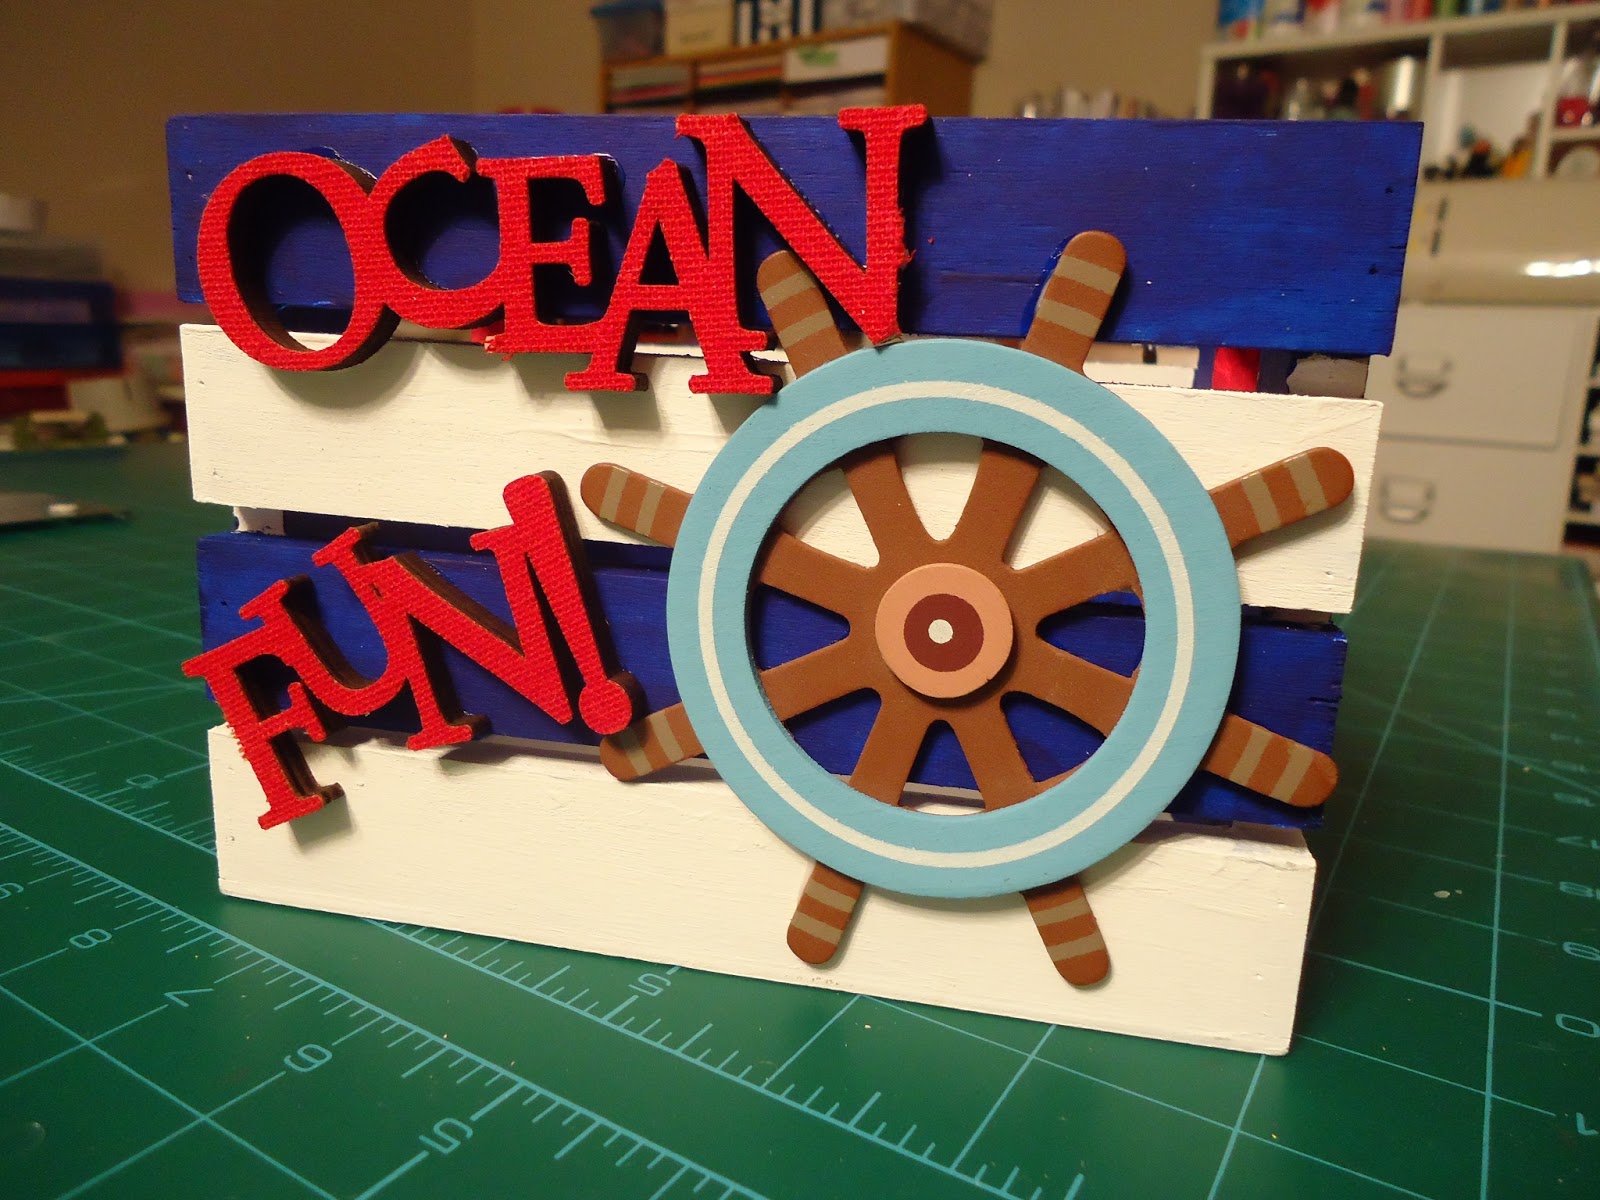
Or rather, that's what they did. I did a box. Because once I got to Michaels and was looking around, I saw this cute little box and instantly had a cute design in my mind for it, and since I already had several picture frames at home that I had yet complete, I thought it was more rational to buy the box than another picture frame.
This is a simple, fun, cheap craft night. Frames are only $1 to $3. My box was $3 I think. Michaels offers a variety of wooden things to choose from, ranging in prices too.
The little wooden pieces to add on are anywhere from about 29 cents to 99 cents. The plain wooden ones are less than the ones that already come painted (like my Ship Wheel).
Then all you need are some paints (If you don't have any, Michaels also has cheap 79 cent Craft Smart acrylic paints), paint brushes, and glue. We tried hot glue first but the wooden pieces weren't sticking, so we switched to Tacky Glue and it worked perfectly!!
Here are out finished products!!

Actually in this picture, my box isn't finished because a box like that takes A LOT longer to paint than a picture frame. So I actually had to finish mine later because we ran out of time. Here is what mine really looked like when I finished.

 I took some more close up pictures because I like taking pictures, and in case you want to get a closer look at my box.

 This side I used a pre-painted ship wheel and a fabric covered wooden phrase I got from Michael's last year, so I'm not sure if they still have them any more. I was actually one long piece with a matching red wheel in between the two words, so I borrowed my sisters massive pocket knife to cut out the wheel so I could arrange the words to fit on the box. :)
 I painted the anchor a metallic silver, and I already had some twine rope that I added for a little extra embellishment.
 This little plaque/tag/label was a plain wooden piece that I painted. In the next picture you can see that there is some red glitter glue on the red stripe for a little extra pizzazz ... I've always wanted to use that word. :)
I'm planning of adding a location and date onto this tag later. I want to go on a beach trip this summer and collect some shells and things to put in this box and turn it into a keep sake of the trip. Maybe even make some sea shell picture holders that I got this idea for. If I do, I'm sure I'll make another post about it so you know what I mean.

 Corner view.

 Can't forget to paint the insides.... so tedious!!!


Tuesday, May 29, 2012

Sea-sters!

My family took a vacation to Edisto Beach in South Carolina last week. So I planned ahead of time to make a sea shell picture frame using sea shells that I found on Edisto Beach! I used a picture of me and my 2 sea-sters (sisters).

A few tips for when you're collecting shells.

  • Find a variety of colors, shapes and sizes
  • Look for unique shells, not just the typical 'shell' shape. It will make your frame more fun!
  • It's okay if they are broken, you might be able to arrange it to hide the broken part
  • Never assume you have enough!! You never know if you're going to end up needing more, or different sizes or shapes to make it all 'fit' together and look good. So if you see any shells that you even THINK you might could or want to use, keep it! You can always just not use it later.
  • Also, if you really want the best shells, you need to get up really early in the morning to go seashell hunting. There are some serious shell hunters who get up at the break of dawn as the tide is going out/in and find the best shells (colors, shapes, types, not broken ones) because they get out there first! I did this a couple of mornings and has some great finds!
Supplies you'll need:
  1. A picture frame or wooden plaque ($1-2 at Michael's)
  2. Paint, and puffy paint (optional) ($1 each at Walmart)
  3. Sea shells, of course (FREE at the beach ;))
  4. an awesome or super cute beach pic from your vaca
  5. Strong, durable glue (I used Power Grab by Loctite, found at Lowes for just a couple dollars)
  6. Modpodge (if you use a wooden plaque)
Here's the how to!
  1. If you decide to, paint the frame/plaque so that any gaps between your shells have a pretty color.
  2. (If using a plaque) Modpodge over the paint, let dry. Then glue down photo where you want it, and modpodge over photo, let dry.  ....... (*I arranged all my shells on the plaque before glueing down my picture. If you look closely you can see my picture is not quite centered. I had some bigger shells on the right tha would have covered up my picture if it were centered. So be mindful of this when positioning your photo)
  3. Arrange shells in the desired placement on the frame/plaque
  4. Using your glue, glue down your shells. Some will be hard because they dont have flat bottoms, so you'll just have to glue around the edges. Try not to apply too much adhesive so that it squeezes and oozes around the edges of your shells, especially if it doesn't dry clear. My glue is more of a caulk, so it's pretty sticky. I read a review of a lady who uses this glue for her shell projects and says it works great. So far I'm satisfied, except that i accidentally got the kind that doesnt dry clear, so i had to be careful. This is a picture of the glue i used.
5. I arranged my shells across the top to say EDISTO, and had one of the bottom for the year 2012 to identify the trip. I used puffy paint to write my letters, so here is where the Puffy Paint comes in if you choose to do that.
6. Let it dry completely and thoroughly! And then you're done!!

Optional Step 7:
I havent done this yet, but since mine is a plaque and has nothing on the back to help i stand or hang on the wall, I'm planning on finding some kind of sea-worthy sailor-looking beachy type rope to use to hang it from. Or ribbon will always look cute of course. So that's up to you!