Showing posts with label craft. Show all posts

Tuesday, March 4, 2014

Gift for Grandma - Count Your Blessings

This craft was inspired by a project I saw somewhere else. I adapted it to the materials I had on hand and what I could get easily or affordable. This is a failry simple gift to make that is perfect for mom's and grandma's. A mother's most joyous blessing is her children, and this gives her a way to proudly show off just how many she has.

I made two of these. One for my mom when she got her first grandchild, and one for my Meemaw. It's a home made pallet wood frame that my dad helped me make. It has routed edges to dress it up a little, and I stained it.

And then, this is where you can tell I'm a broke college kid. I took a cereal box and cut out the wide side panels, one for each frame, large enough to cover the opening of the frame. I then chose my scrapbook paper and glued it to the cereal box, and then I hot glued the cereal box to the back of the frame. So fancy. Just don't look at the back, haha.

I used my Cricut to cut out my words, and some glitter glue to dress it up. I purchased some chalkboard vinyl with an adhesive backing for the 3 panels. I purchased a box of chalk, and fashioned a chalk holder with a piece of paper and magnet to attach it to the back of the frame to always have chalk nearby.

 Then I just went to Michael's to get some plate stands to display it!


 Here is a picture of the cereal box backing. Obviously the printed side is on the inside, covered up by the scrapbook paper. And the black square is the magnet where the chalk attaches.

Monday, March 3, 2014

DIY Picture Puzzle

Several weeks ago, one of my friends from Centrikid that lives forever away in North Carolina sent me a package in the mail. It was a few silly little items that most people wouldn't mean much. But they completely made my day because of the thought she put into the package, which was to remind me of all the fun times we had a camp. Water balloons, flarp, and a rainbow colored bandana, along with a wonderfully encouraging card.

I had been wanting to send some people from camp some letters anyway, so this was perfect motivation for me to finally get around to it. I knew if anyone loves getting things in the mail even half as much as I do, then hopefully they would appreciate some snail mail.

I needed something new, exciting, unusual, and fun! So this is what I came up with. A picture of me and my friend in the form of a puzzle, and I made it all on my own! Keep reading for instructions.


Step 1: Go to the dollar store and pick out a 24 piece puzzle. You could get a 32 or more piece, but it's easiest to work with bigger pieces. I used this cute little Precious Moments Puzzle. (WARNING: The cuter the puzzle, the harder it is to cover it up in step 2!)

Step 2: Paint the puzzle white! What I did was put the puzzle together and then I tried to paint over it like it was a canvas with white acrylic paint. Let me tell you why this is not a good idea.

  1. Once acrylic paint starts to dry, it dries like a solid sheet, which means all your pieces stick together and if you try to pull them apart, it's very easy to peel the paint off one or both pieces. If you've ever gotten acrylic paint on your hands and peeled it off, you know what I'm talking about when I say it dried as one big layer.
  2. It takes a lot of paint because it's basically guaranteed you'll have to give it a second coat, which I went back and did on each individual piece rather than do the whole thing again. (I was catching on :))
  3. Because of steps 1 and 2, this takes a lot of time. Paint one coat, let it dry. Pull your pieces apart. Paint each individual piece with a 2nd coat. Let it dry. Possible have to touch a few pieces with a 3rd coat. Let it dry.
So what do I suggest? Spray paint. White spray paint. It will get a good, even, thick covering, and will dry relatively fast. And even if you do have to add a second coat, all it takes is a minute to do. I would lay all my pieces out on newspaper, NOT CONNECTED, -but make sure they are oriented correctly so you know what piece goes where, other wise you're trying to work a solid white puzzle before you can move on!!! - and spray paint them.

Once the puzzle pieces are dry, put it together.

Step 3: Find the picture you want to use. This is the one I used.

Then use a photo editing program, I used Picasa, to get a pencil sketch and crop it down. Make sure it has plenty of lines for detail.

Step 4: Print out your sketch picture in the correct size for your puzzle. Obtain some graphite/carbon transfer paper. Place the transfer paper under your picture, be sure the waxy side is face down on your puzzle, and trace all the important lines, which is anything defining in the face, hair, and clothing, and all the outline lines, of course. I'm sure you can tell that I ignored the background, I only traced the 2 people.

Step 5: Once your people are traced onto to the puzzle, it's time to color it. I used a makeup wedge sponge and some stamping ink. I chose the sponge and ink technique (hey, that rhymed :) ) because I wanted the look of the softer edges. And because I knew the ink would still allow my carbon transfer lines to show through, especially in the lighter colors, a little less so in the darker colors.
However, if the ink did look a little too think over the carbon lines, it fixed very easily with a black colored pencil.

One thing I did not like about using the stamping ink was that it took forever to dry because the acrylic paint is not porous like paper, and so it couldn't soak it up. In fact, there were a few places there I had too much ink that it never dried. I fixed this problem in step 6, but if you are unable to do step 6, I suggest finding a different medium to color with, maybe paint or even markers. Not sure how markers work on spray paint though, never tried it.

Step 6: This step is not 100% necessary, unless your ink isn't drying. But even if your ink is drying, this step is a good finishing step to make your puzzle look better and last longer. And that would be, coat it with Clear Acrylic Sealer, (if your ink is not dry, only use the spray can kind or obviously your ink will smear.)

When I sprayed my pieces, I had taken them apart because I wasn't sure if the sealer would act the same as the acrylic paint when it dried, making them stick together. So just as a precaution, I suggest taking apart your puzzle before spraying it.
Be sure to follow the instructions on the can, and make sure you do this step out side.

When you're done and the pieces are dry, you'll have a nice, smooth, glossy coated puzzle. Another plus is that this weighs less than 13 ounces, which means you can mail it straight from your mail box. I just put all the pieces in a ziplock baggie, put it in a padded mailing envelope, used Paypal to pay for postage and print out a label, and it was good to go. It only cost me $1.92 to mail it. So add 1 dollar for the puzzle, and I already had everything else, and this was a $3 project. :)

Saturday, October 5, 2013

Bookmark Monsters!

I have a really cute project today, and it allows for a lot of creativity and variation for personal tastes.
These are book marks that you slip on the corner of the page of a book. You can make them, cute, pretty, plain, simple, or however you want. I've made 5 so far, and I'm not done, because I'm making several for my friends, mom, and grandmother, who all love to read.
I'll show you how to make just a simple patterned one, and then you can embellish and decorate and design it up however you want.

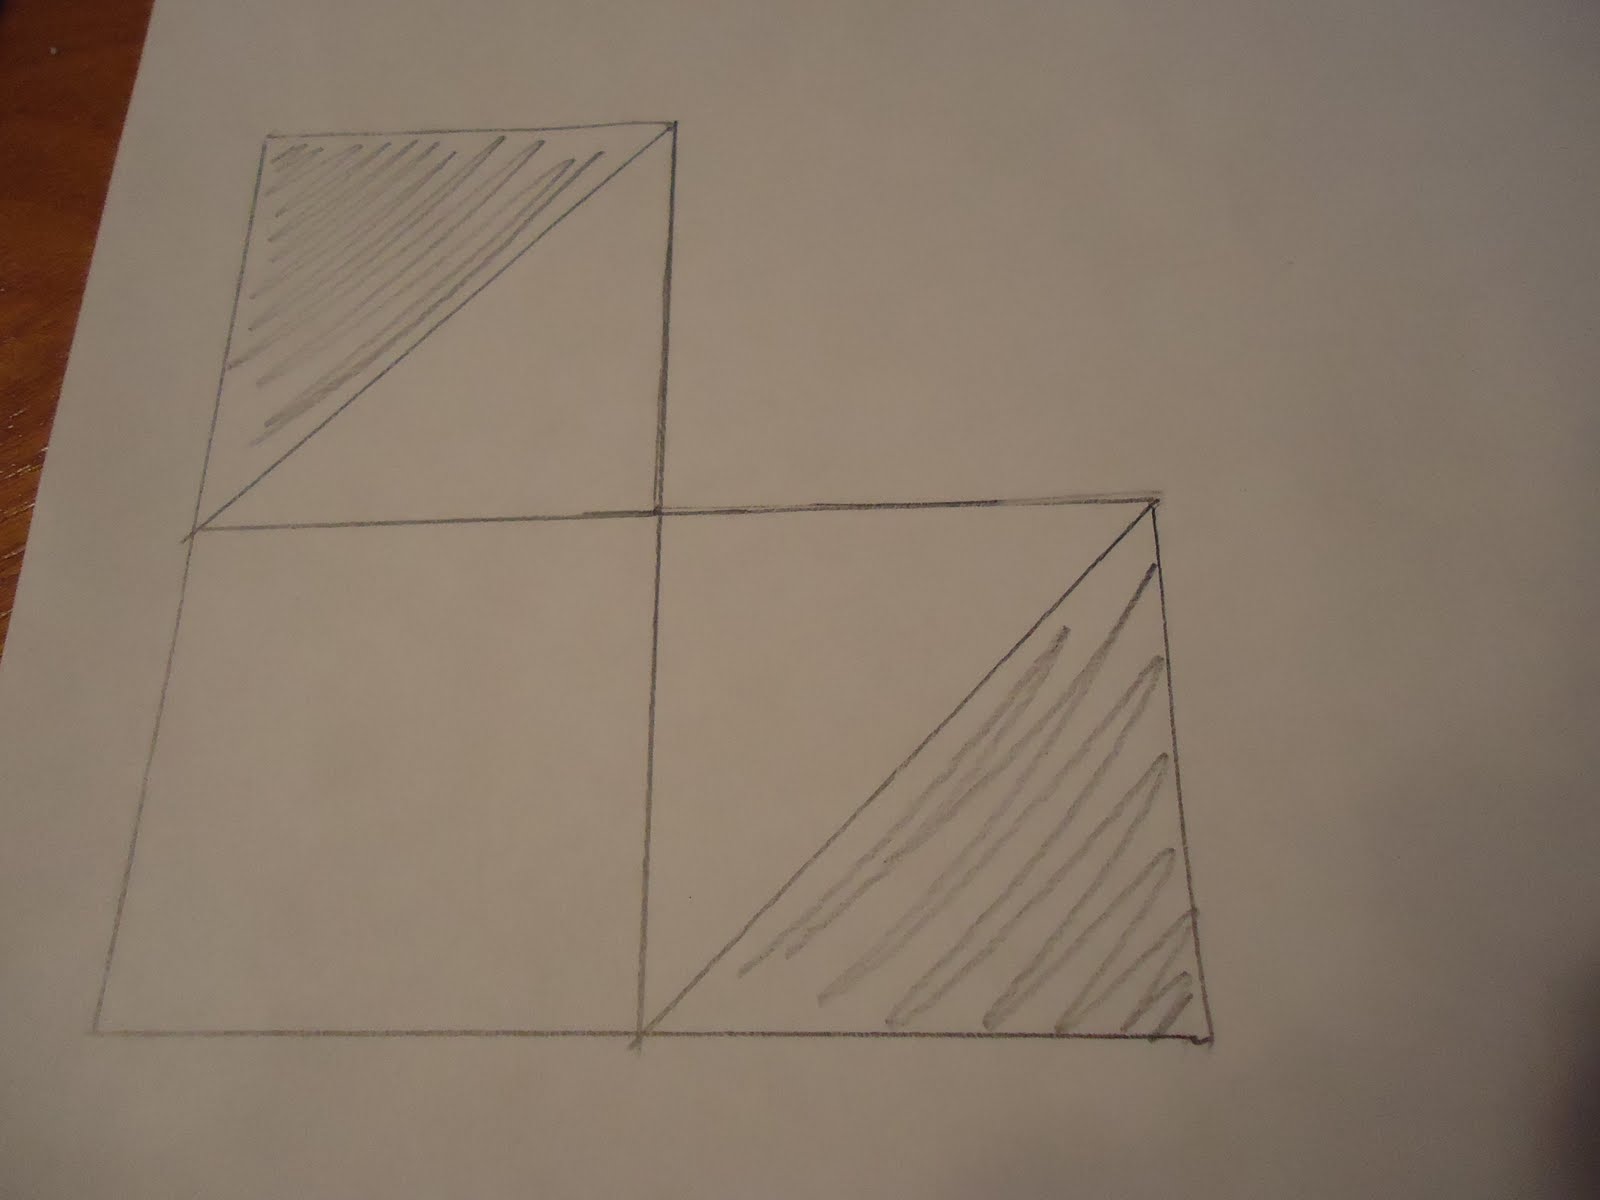
Step 1: First you need to draw a square. Then draw another identical square sitting directly on top of that one, and then another one sitting directly on the side of the first one, so that they form a L shape, like the picture below. Mine are 2 1/4" squares.

Step 2: Divide the 2nd and 3rd squares diagonally, as shown below. Be as precise as possible. Shade in the corresponding area if needed. These are the areas we don't need. Cut the shape out, cutting off the shaded areas.

Step 3: Trace the shape onto the paper you want to use as the base for your book mark. I'm using grey, because I'm using a color scheme of my friend's favorite colors.
 Step 4: Now you need to score the card stock where the lines are that divide the triangles from the square.
Make sure you score off both triangles.
Step 5: Fold the triangles so they overlap, and glue the top triangle to the bottom triangle. If you want to add a color or pattern underneath, apply it before you glue the triangles down.
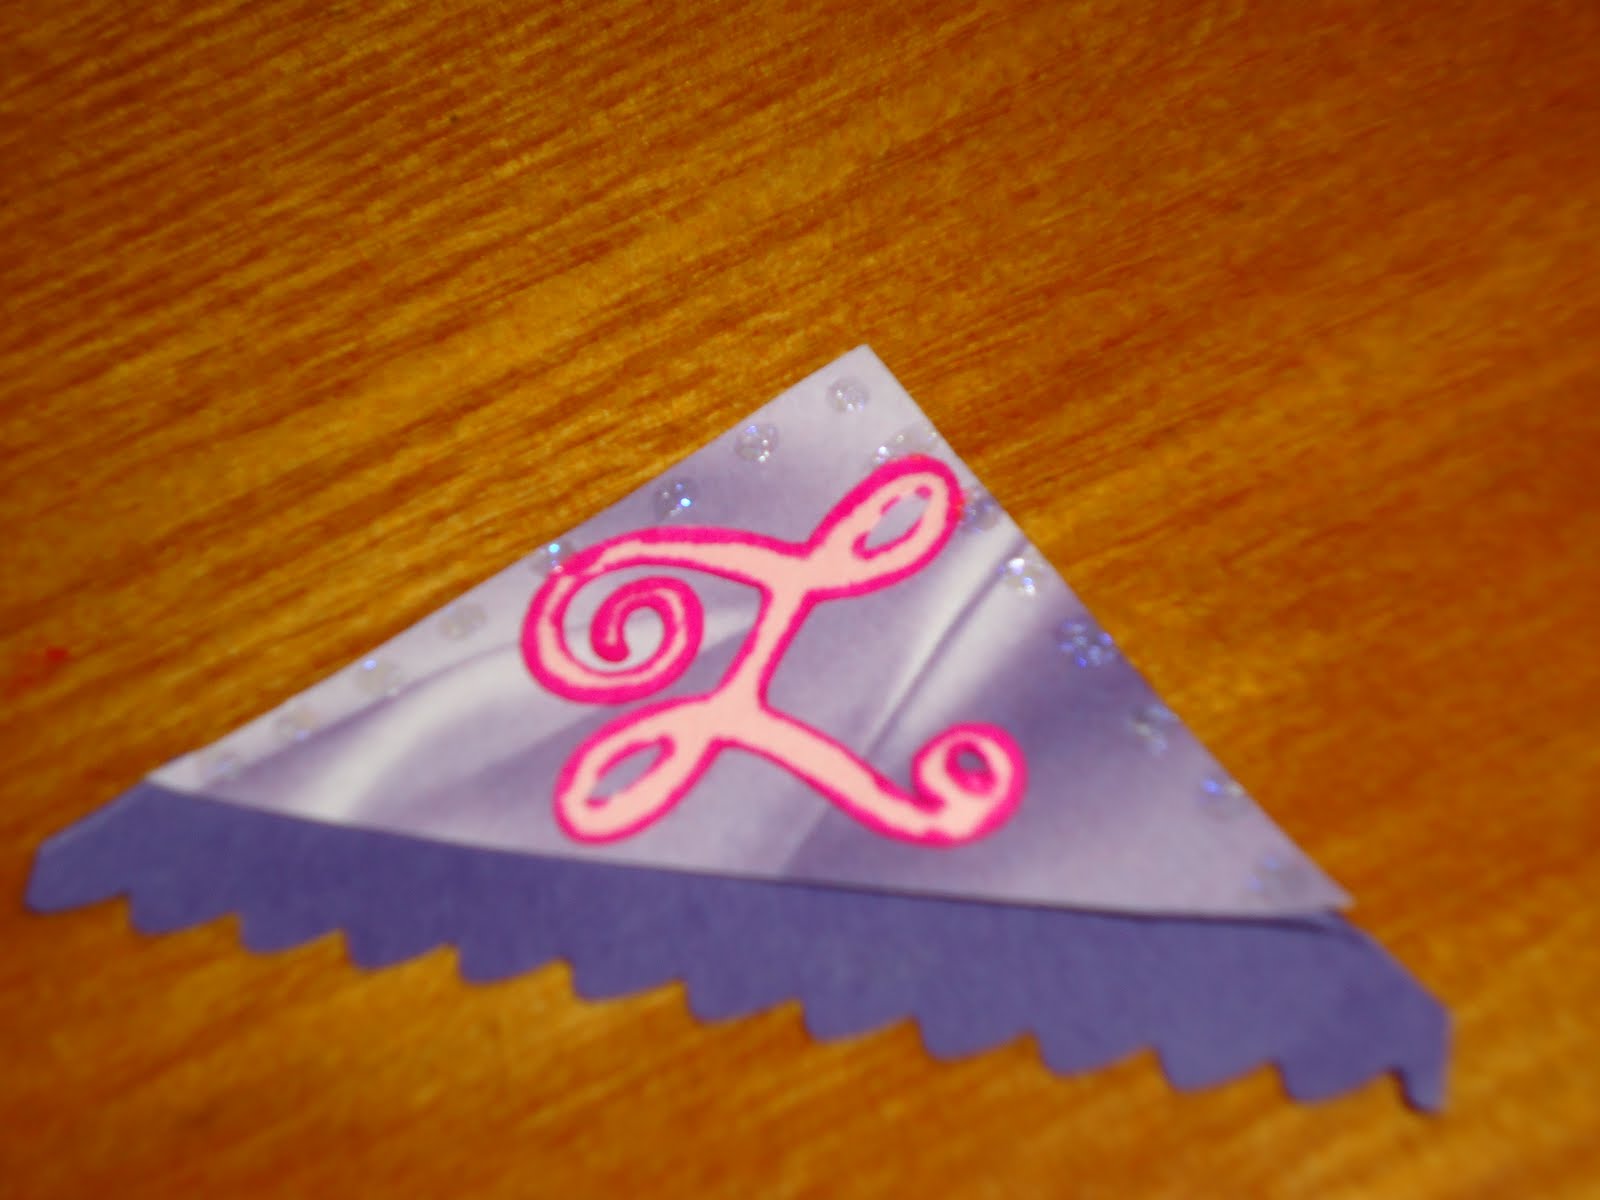
  Step 6: Decorate however you want. Here is a picture of a few that I have made. 2 simple ones, and 2 monsters.

Here is another that uses a slightly different pattern.
To get the pattern for this one, follow Steps 1 & 2 from above. The follow the following steps.
Step 3: Divide the 3rd square in half, then draw another line about a 1/2 inch below that line.
 Step 4: Erase the middle line and extend the straight lines to square off the corners, like below. Shade the triangle if you want, since you won't need it.
 
Step 5: Cut out the shape, and cut off the shaded regions. Trace the shape onto your paper, and make marks where the little triangles meet the big triangle. Extend the mark to the inside of the shape so you can still see them once you cut it out.
 Step 6: Score the paper, separating the triangles from the square. Use the marks you made as a guide.

Follow Steps 5 & 6 from above to fold and decorate.

Saturday, March 23, 2013

Craft Night!!!

Sometimes it's good to just stay in and have a craft night with a few friends.  So that's what me and two of my friends did.

Our projects vary from time to time. A lot of the canvases that I've posted have been a result of a craft night. This time, our project was inspired by Michaels, the craft store. My best friend was there and saw some cute wooden frames and little wooden shapes that you can pick out and paint and glue on. So that's what we did....

Or rather, that's what they did. I did a box. Because once I got to Michaels and was looking around, I saw this cute little box and instantly had a cute design in my mind for it, and since I already had several picture frames at home that I had yet complete, I thought it was more rational to buy the box than another picture frame.
This is a simple, fun, cheap craft night. Frames are only $1 to $3. My box was $3 I think. Michaels offers a variety of wooden things to choose from, ranging in prices too.
The little wooden pieces to add on are anywhere from about 29 cents to 99 cents. The plain wooden ones are less than the ones that already come painted (like my Ship Wheel).
Then all you need are some paints (If you don't have any, Michaels also has cheap 79 cent Craft Smart acrylic paints), paint brushes, and glue. We tried hot glue first but the wooden pieces weren't sticking, so we switched to Tacky Glue and it worked perfectly!!
Here are out finished products!!

Actually in this picture, my box isn't finished because a box like that takes A LOT longer to paint than a picture frame. So I actually had to finish mine later because we ran out of time. Here is what mine really looked like when I finished.

 I took some more close up pictures because I like taking pictures, and in case you want to get a closer look at my box.

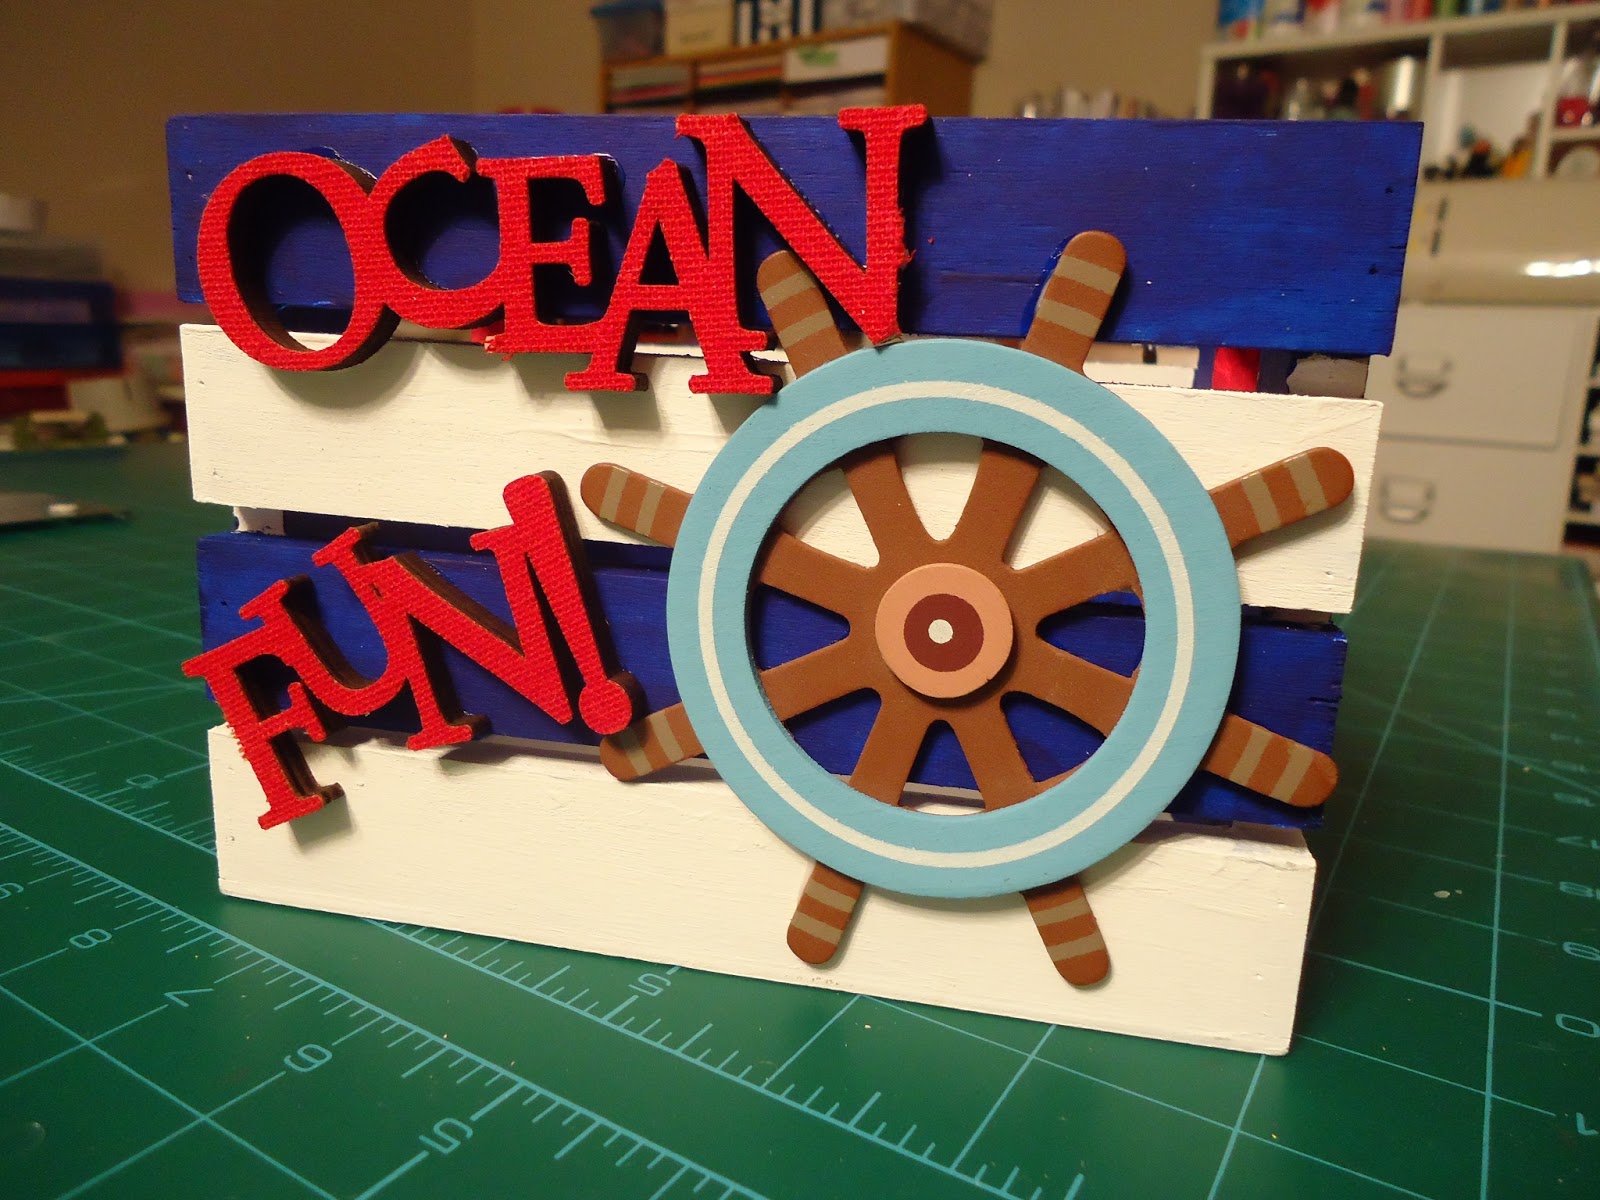
 This side I used a pre-painted ship wheel and a fabric covered wooden phrase I got from Michael's last year, so I'm not sure if they still have them any more. I was actually one long piece with a matching red wheel in between the two words, so I borrowed my sisters massive pocket knife to cut out the wheel so I could arrange the words to fit on the box. :)
 I painted the anchor a metallic silver, and I already had some twine rope that I added for a little extra embellishment.
 This little plaque/tag/label was a plain wooden piece that I painted. In the next picture you can see that there is some red glitter glue on the red stripe for a little extra pizzazz ... I've always wanted to use that word. :)
I'm planning of adding a location and date onto this tag later. I want to go on a beach trip this summer and collect some shells and things to put in this box and turn it into a keep sake of the trip. Maybe even make some sea shell picture holders that I got this idea for. If I do, I'm sure I'll make another post about it so you know what I mean.

 Corner view.

 Can't forget to paint the insides.... so tedious!!!


Saturday, February 2, 2013

Sock Monkeys (2)

Finally got around to finishing Sock Monkey #2, the blue one :).

So, I've loved monkeys for as long as I can remember, and while I've always liked sock monkeys simply because they are monkeys, I've developed a new love for sock monkeys in the recent years. I think it's because they fall into the old fashioned and vintage category, I like things that fall into that category.

Well, last year I found a pattern for home made sock monkeys on Pinterest, which you can find here, and I knew that I just had to try it!! So I did some searching and found some striped socks with colors I wanted. It was a really difficult process to find some that I was willing to pay the price for. If you want to know my searching methods, you can read about in my first Sock Monkey blog post.

Anyway, so I made a sock monkey. And it turned out okay. But since I really have almost NO experience with sewing, I was pretty darn proud of my sock monkey. I actually made 2, but I didn't finish the second one. And it ended up laying in my room looking like a Mr.Potato Head that had fallen apart. (I had basically done everything except attach the limbs and stitch in the mouth.) A couple weeks ago, I FINALLY got around to finishing it. And even though I've already posted once about my first sock monkey, I decided to go ahead and post again to show them both off. Because like I said, even though they aren't perfect by any means, I'm still pretty darn proud of them :).

So, just to recap, here is my first monkey. Isn't he just so cute?? :) Well, he's cute to me anyway, lol.


Here is my second monkey!! He's blue!!! (Can you tell this is from my Instagram post, hehe. #picstitch)


And now, here are both of my monkeys together, where I keep them on display perched on the window sill in my room. (They get along pretty great ;) . )


Now that I've made 2, and learned from my mistakes from each, and there were several mistakes on each, I've decided that I don't want to stop here. I want to make a real, original, Rockford Red Heel Sock Monkey. Which I've actually wanted to do from the start. Unfortunately, Rockford socks are expensive because of their vintage quality, i guess you could say. 

Lucky for me, I stumbled across them ON SALE on an online store!!! And so I snatched up the opportunity!! I got a better price per pair of socks if I got them in a 2 pack. And since I do love my sock moneys, I thought to myself, "You can never have too many sock monkeys!!" (Besides, if I only made one more, then I would have 3, and I don't want one to end up being a third wheel. So it's better to have 4! Right??) But then I saw that they not only had brown socks, they also had BLUE and PINK!! I don't like pink though, so I couldn't care less about those. But they had BLUE socks too!!! Blue is my favorite color!! (Along with green of course). I could resist. So I got 2 pairs of blue and 2 pairs of brown. And then I saw the pattern book, also on sale, and I knew I had to get it!!!
So this is what I ended up with!!
However, the book has patterns not only for monkeys, but all the Rockford Red Heel sock friends. Dogs, squirrels, elephants, bunnies, cats, horses... and more!! So I have a plan!!
I will make a brown and a blue monkey. And then I will make a brown puppy, and blue elephant!!

I don't know when I'll make it because I'm currently in the middle of a t-shirt quilt (my first quilt!! not including my rag quilt, which I don't count because no 'quilting' was involved.) But once I make them, I will definitely post them to share with you!!!

P.S. If you want to check out where I bought my Rockford Red Heel socks and Pattern Book, I think it was a website called 'Embroidered for Baby' or something similar to that. Just google it and I'm sure you can find it!

Wednesday, October 31, 2012

Foil Art

So I found this project on Pinterest where you draw a design in glue that dries puffy, then cover it with aluminum foil, and then polish with she polish. So I tried it, and I did a little three piece set with a galactic theme. Here are my finished pieces.
If you want the instructions for how to make these, you can go here. This blog has really good instructions. They are the ones I followed.

Thanks for stopping by, i hope you like it!

Thursday, August 9, 2012

Mickey Washer Necklace

So I have a friend interning at Disney, and I have another friend (that's right, i have 2 friends) who is taking a trip to Disney. So I wanted to make them something Disney. So here it is, Disney Washer Necklaces. :)


Supplied you'll need:
2 sizes of washers. I used 1/4" and 7/16"

 Hole punches that fit the size of your washers. For me, I needed 7/8" and 1/2" for the big washers. And I needed 5/8" and 5/16" for the small washers.

Modpodge and brush, jewelry wire, and string to make it a necklace. And also, not pictured, paper.

Step 1: Choose your paper, patterned/solid, its up to you. Punch the smaller punch first for the center of the washer, then center than in the bigger punch (hold it upside down so you can see). For these sizes, I actually had to go back and trim a tiny amount off the edge of the smaller washer size because i wanted to see the silver of the washer as a border.

Step2: Glue the paper rings onto the washers. You can use modpodge or whatever glue you want for this part.

Step 3: Put a layer of modpodge over the washers, let dry. If you look at the picture under step 4, you might be able to tell, I had an old Cricut mat that wasn't sticky enough for paper anymore, so I used it to put the washers on to help keep them from moving while I modpodge them, that way I didn't have to hold them and get modpodge all over my fingers.

Step 4: Glue the "ears" onto the big washer so that they will stay in place. Make sure there is enough spave between them for the necklace string.


Step 5: Wrap the wire to secure the washers into place. try to get it as tight as possible.

Step 6: Add the string for the necklaces, and you're done.

Tuesday, May 29, 2012

Sea-sters!

My family took a vacation to Edisto Beach in South Carolina last week. So I planned ahead of time to make a sea shell picture frame using sea shells that I found on Edisto Beach! I used a picture of me and my 2 sea-sters (sisters).

A few tips for when you're collecting shells.

  • Find a variety of colors, shapes and sizes
  • Look for unique shells, not just the typical 'shell' shape. It will make your frame more fun!
  • It's okay if they are broken, you might be able to arrange it to hide the broken part
  • Never assume you have enough!! You never know if you're going to end up needing more, or different sizes or shapes to make it all 'fit' together and look good. So if you see any shells that you even THINK you might could or want to use, keep it! You can always just not use it later.
  • Also, if you really want the best shells, you need to get up really early in the morning to go seashell hunting. There are some serious shell hunters who get up at the break of dawn as the tide is going out/in and find the best shells (colors, shapes, types, not broken ones) because they get out there first! I did this a couple of mornings and has some great finds!
Supplies you'll need:
  1. A picture frame or wooden plaque ($1-2 at Michael's)
  2. Paint, and puffy paint (optional) ($1 each at Walmart)
  3. Sea shells, of course (FREE at the beach ;))
  4. an awesome or super cute beach pic from your vaca
  5. Strong, durable glue (I used Power Grab by Loctite, found at Lowes for just a couple dollars)
  6. Modpodge (if you use a wooden plaque)
Here's the how to!
  1. If you decide to, paint the frame/plaque so that any gaps between your shells have a pretty color.
  2. (If using a plaque) Modpodge over the paint, let dry. Then glue down photo where you want it, and modpodge over photo, let dry.  ....... (*I arranged all my shells on the plaque before glueing down my picture. If you look closely you can see my picture is not quite centered. I had some bigger shells on the right tha would have covered up my picture if it were centered. So be mindful of this when positioning your photo)
  3. Arrange shells in the desired placement on the frame/plaque
  4. Using your glue, glue down your shells. Some will be hard because they dont have flat bottoms, so you'll just have to glue around the edges. Try not to apply too much adhesive so that it squeezes and oozes around the edges of your shells, especially if it doesn't dry clear. My glue is more of a caulk, so it's pretty sticky. I read a review of a lady who uses this glue for her shell projects and says it works great. So far I'm satisfied, except that i accidentally got the kind that doesnt dry clear, so i had to be careful. This is a picture of the glue i used.
5. I arranged my shells across the top to say EDISTO, and had one of the bottom for the year 2012 to identify the trip. I used puffy paint to write my letters, so here is where the Puffy Paint comes in if you choose to do that.
6. Let it dry completely and thoroughly! And then you're done!!

Optional Step 7:
I havent done this yet, but since mine is a plaque and has nothing on the back to help i stand or hang on the wall, I'm planning on finding some kind of sea-worthy sailor-looking beachy type rope to use to hang it from. Or ribbon will always look cute of course. So that's up to you!

Wednesday, May 9, 2012

Sock Monkey

I love monkeys, and I love sock monkeys.

However, I've never had a sock monkey, and even though I've asked for one for several years for christmas and my birthday, I've yet to get one. Soooo... I decided to take matters into my own hands and make my own sock monkey. :)

This is what he looks like.
Obviously he has a few flaws. As you can tell his right arm (the one on the left in the picture) had some stretching issues. And I sort of messed up around the mouth, which you can't see in this picture.  I'm an extreme beginner when it comes to sewing, so I sort of just guesses when I came to sewing on his extremities. But I managed. I think he turned out pretty well considering my lack of adeptness at hand sewing, and with him being my first sock monkey.

If you want to make one, go to this site, Craft Passion - Sock Monkey.  This blog has the pattern and instructions that I used to make mine own sock monkey. Her's look WAAAY better than mine, but I also am pretty sure she is an avid and pro sewer. (As in a person that sews, not a feces drainage system).

If you are looking for socks to find, good luck. I had a ton of trouble trying to find socks at cute as hers. The socks I used came from Zappos.com. But here are some key words to search/look for if you want to find wide-striped socks.

  • crew socks
  • rugby stripe
  • color block
  • wide stripe
P.s. I got to thinking about it, and you probably could use knee socks. If you didn't want an super gangly monkey, you could just not use the full length of the socks for the arms and legs. The reason I am telling you this is because it's easy to find cute/crazy colors and stripes in knee socks. When it comes to crew socks, thats a whooooole 'nother story.

Friday, April 27, 2012

Altered Puzzle

So, my friend and I were trying to find an art/craft project we could do. and we found a blog post from 'Oops, I craft my pants' of an altered puzzle. it looked really cool, so we decided to do it too!

An altered puzzle is where take a puzzle, and give the pieces a make over using your own style and interests. Everyone's puzzle will be as unique as each piece of a puzzle. Here is what my finished product looked like.

As you can see, i just used scrapbook paper to do this. But I'm thinking I want to make one with pictures of friends and/or family. I think that would look super cool. But we'll see...

So, are you ready to give it a try?? Here's what you'll need:
1 Puzzle (you'll probably want 24 piece, or 16 if you can find one)
Scrapbook Paper - lots of different designs/patterns
Modpodge/Rubber Cement/ some good glue
Scissors - regular size and small size for ease
Embellishments - whatever kind you want!!

Optional: you might want an exact knife or a rotary tool or something similar to help trim off excess paper. but i found a way to not need one, i'll tell you how below.

Got everything?? Great!! Let's get started!!

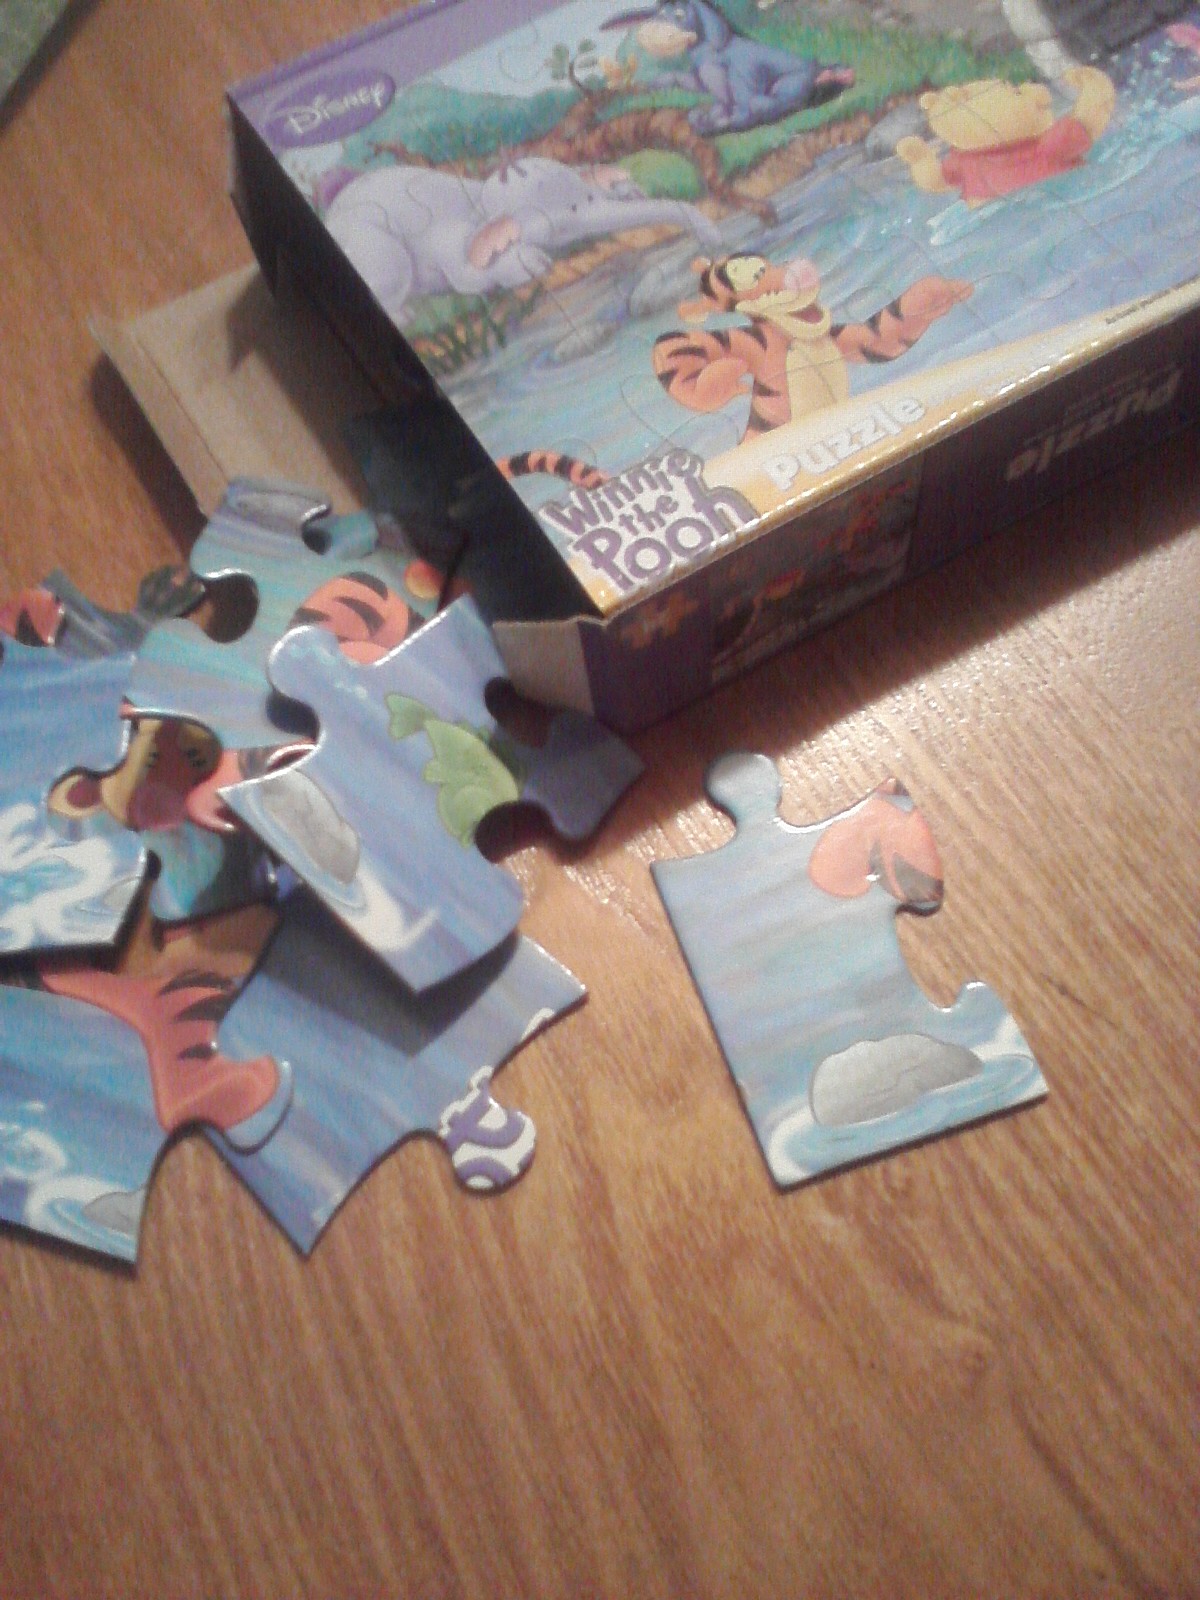
Step 1:  Get your puzzle. You can get 24 piece puzzles at the Dollar Store. I got a Winnie the Pooh one. You want 24 or 16 if you can find one because you need you pieces to be big enough to work with.
Go ahead and put the puzzle together. Then flip it over and number the pieces. This will help you later when you've covered up the picture and the pieces don't fit as well because of the paper. With numbers you'll know it's in the right place.

Step 2: Time to cover every piece with scrapbook paper. I chose to make sure every piece was different, but feel free to use duplicate patterns. It's hard to find 24 different designs that all match... that's another thing, i tried to color coordinate mine, you can do yours however you want!

When cover your puzzle piece, it is very important that your paper is precisely the same size as the piece. If it's too small, you'll see the picture peeking out from the sides. If it's too big, it will hang off and make the piece not fit together because the excess paper will be in the way. So here is my trick.

First, go ahead and trace your piece onto paper. If you trace it on the back side, make sure you flip the piece over too or else you'll end up with a mirror image instead of an exact image.
If you use this little trick to cut it out, it can save a lot of trouble. If you don't care and just want to have at it, you can skip this paragraph... When cutting out the shape, cut INSIDE the traced line. Usually you cut on the outside of the line, but you want to cut on the inside! This is because when you traced the shape, your pencil couldn't get right against the edge. If you have a steady hand at cutting, then add about 2 millimeters of space inside your line while you're cutting it out. If you do this, your shape will be almost perfect.

Time to trim it up and make sure there is no excess.  By trial and error, I found that it is NOT a good idea to go ahead and glue it on and then try to trim it down to the right size. Line the paper up on the puzzle piece as best you can, make sure the whole front it covered. Then look at it from the backside. If you see ANY paper extending past the puzzle piece, even the tiniest little bit, TRIM IT OFF. You may think that less that an millimeter shouldn't make a difference, but you would be surprised.  I know it's hard to get into the curves, but do your best. Be careful not to trim off too much!!

Step 3: Glue the paper onto the piece, line it up as perfectly as possible... Do this for all your puzzle pieces. It should look like this now, except you don't have to have it put together.  The reason mine is, is because I kept it together as I covered the pieces to make sure the adjacent pieces matched each other and i didn't have any clashing paper.


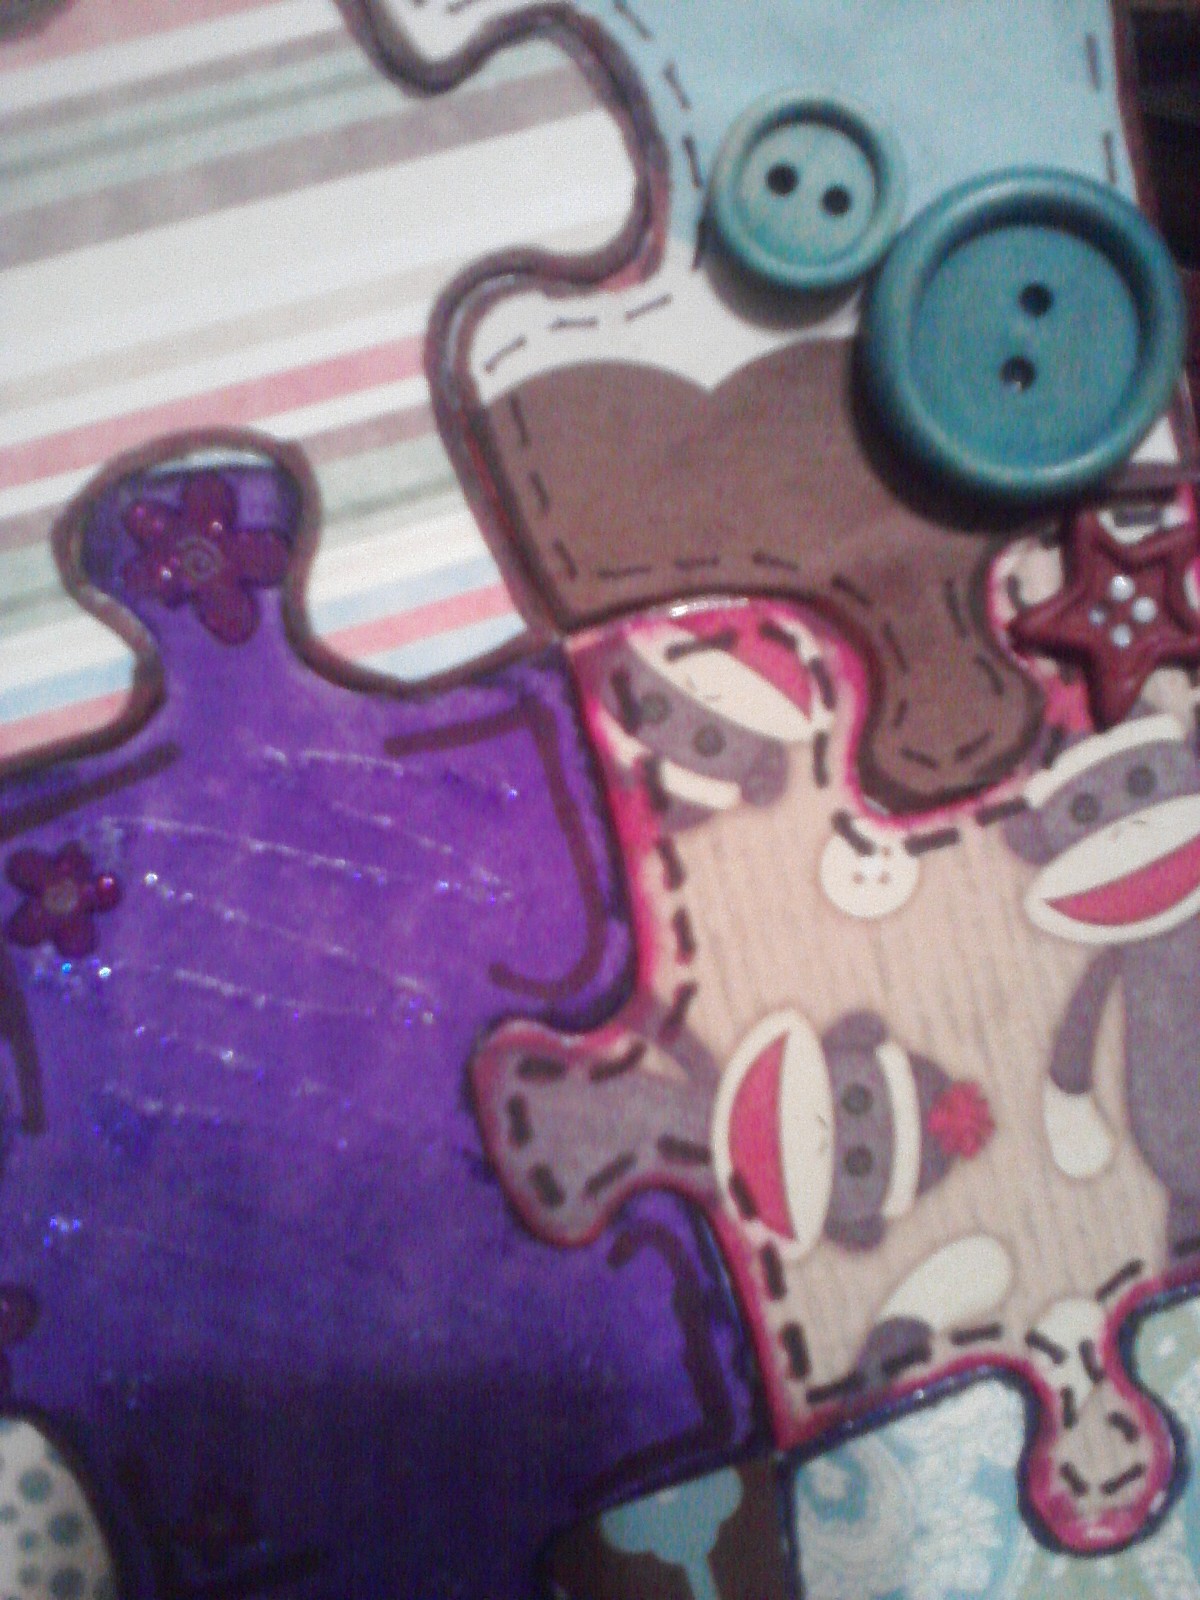
Step 4: Time to decorate!!! Here you get to add a little something extra to your piece. Use your imagination and be creative. Don't be afraid to use inspiration from my puzzle or other puzzles that you can see if you google "altered puzzle."  That's what I did.

             I used glitter glue, rub on stickers, brads, stamp ink with Q-tips to ink some of the edges, sharpies,  
             buttons, little metal things i found at the HobLob, a wax stick thats shapeable, letter diecuts, and my
             cricut to get the '2012'.
You could also use paint, glitter, stencils... anything really. Just see what you have laying around/

Step 5:  Once all your pieces have dried completely, start piecing it back together. You might be glad for those numbers on the back now ;).  The pieces will be stubborn and won't want to go together. Remember that puzzle rule "Never force a piece into place"? ignore it. Force it in. Use a little force by not too much. Don't tear or bend the pieces. Get it is as flat as possible.

Step 6: This step is really dependent on what you're doing with your puzzle.  I don't know yet if i want to frame mine or just hang it up. So I smeared the back with Modpodge and put a piece of paper over the back to make sure it wouldn't fall apart if i decide to move it.

If i decide to hang it up, i think i want to find a ribbon that matches and glue each end to a corner on the back and hang it like that... or i might frame it... not sure yet. havent decided.

Anyway... There you go, and altered puzzle. It take quite a bit of time and patience. The tracing, cutting, and trimming part is rather tedious. But who doesn't enjoy a good challenge???

Here are some close ups of some of my pieces so you can see them better.
Let me know what you think!!