Showing posts with label diy. Show all posts

Tuesday, March 4, 2014

Gift for Grandma - Count Your Blessings

This craft was inspired by a project I saw somewhere else. I adapted it to the materials I had on hand and what I could get easily or affordable. This is a failry simple gift to make that is perfect for mom's and grandma's. A mother's most joyous blessing is her children, and this gives her a way to proudly show off just how many she has.

I made two of these. One for my mom when she got her first grandchild, and one for my Meemaw. It's a home made pallet wood frame that my dad helped me make. It has routed edges to dress it up a little, and I stained it.

And then, this is where you can tell I'm a broke college kid. I took a cereal box and cut out the wide side panels, one for each frame, large enough to cover the opening of the frame. I then chose my scrapbook paper and glued it to the cereal box, and then I hot glued the cereal box to the back of the frame. So fancy. Just don't look at the back, haha.

I used my Cricut to cut out my words, and some glitter glue to dress it up. I purchased some chalkboard vinyl with an adhesive backing for the 3 panels. I purchased a box of chalk, and fashioned a chalk holder with a piece of paper and magnet to attach it to the back of the frame to always have chalk nearby.

 Then I just went to Michael's to get some plate stands to display it!


 Here is a picture of the cereal box backing. Obviously the printed side is on the inside, covered up by the scrapbook paper. And the black square is the magnet where the chalk attaches.

Gift for Grandad - Card Playing Lap Board

My Granddaddy used have a piece of board that he used to play solitaire on all the time. It was wide enough to rest on the arms of his recliner across his lap. Until one day they bought a new, bigger recliner, and his board wasn't wide enough to reach across anymore. So he stopped playing cards.
This past year for Christmas, my brother and I decided to make him a new board that was big enough to fit his big recliner. And since he's a big Ole Miss fan, we gave it an Ole Miss theme.


It's not the best picture, but here it is. My brother made the board, so I'm not sure exactly how he did it. He had some pieces of thin panel left over from something else he had built, so he glued 2 pieces together to made it sturdy. You can't see it in the picture because it isn't far enough away, but he used some kind of saw to round the edges, and then he sanded it. Then he brought it to me to paint.


First I primed it. Then I painted the front Navy Blue and the back Red, which you can see in the picture below. Then I found the logo and the Colonel online and printed it out big. I used carbon/graphite transfer paper to trace it one. I painted it all in white first, then went back and added the red. Then I retraced the Colonel's features onto him since I had painted over them, and I think I went back and used black paint on those details so make sure they didn't rub off.

Then I gave the board back to my brother, and he polyurethaned it, to seal it and give a nice finish.

Granddaddy loved it, and now he can play cards again. Here is a picture of him using the board.


Monday, March 3, 2014

DIY Picture Puzzle

Several weeks ago, one of my friends from Centrikid that lives forever away in North Carolina sent me a package in the mail. It was a few silly little items that most people wouldn't mean much. But they completely made my day because of the thought she put into the package, which was to remind me of all the fun times we had a camp. Water balloons, flarp, and a rainbow colored bandana, along with a wonderfully encouraging card.

I had been wanting to send some people from camp some letters anyway, so this was perfect motivation for me to finally get around to it. I knew if anyone loves getting things in the mail even half as much as I do, then hopefully they would appreciate some snail mail.

I needed something new, exciting, unusual, and fun! So this is what I came up with. A picture of me and my friend in the form of a puzzle, and I made it all on my own! Keep reading for instructions.


Step 1: Go to the dollar store and pick out a 24 piece puzzle. You could get a 32 or more piece, but it's easiest to work with bigger pieces. I used this cute little Precious Moments Puzzle. (WARNING: The cuter the puzzle, the harder it is to cover it up in step 2!)

Step 2: Paint the puzzle white! What I did was put the puzzle together and then I tried to paint over it like it was a canvas with white acrylic paint. Let me tell you why this is not a good idea.

  1. Once acrylic paint starts to dry, it dries like a solid sheet, which means all your pieces stick together and if you try to pull them apart, it's very easy to peel the paint off one or both pieces. If you've ever gotten acrylic paint on your hands and peeled it off, you know what I'm talking about when I say it dried as one big layer.
  2. It takes a lot of paint because it's basically guaranteed you'll have to give it a second coat, which I went back and did on each individual piece rather than do the whole thing again. (I was catching on :))
  3. Because of steps 1 and 2, this takes a lot of time. Paint one coat, let it dry. Pull your pieces apart. Paint each individual piece with a 2nd coat. Let it dry. Possible have to touch a few pieces with a 3rd coat. Let it dry.
So what do I suggest? Spray paint. White spray paint. It will get a good, even, thick covering, and will dry relatively fast. And even if you do have to add a second coat, all it takes is a minute to do. I would lay all my pieces out on newspaper, NOT CONNECTED, -but make sure they are oriented correctly so you know what piece goes where, other wise you're trying to work a solid white puzzle before you can move on!!! - and spray paint them.

Once the puzzle pieces are dry, put it together.

Step 3: Find the picture you want to use. This is the one I used.

Then use a photo editing program, I used Picasa, to get a pencil sketch and crop it down. Make sure it has plenty of lines for detail.

Step 4: Print out your sketch picture in the correct size for your puzzle. Obtain some graphite/carbon transfer paper. Place the transfer paper under your picture, be sure the waxy side is face down on your puzzle, and trace all the important lines, which is anything defining in the face, hair, and clothing, and all the outline lines, of course. I'm sure you can tell that I ignored the background, I only traced the 2 people.

Step 5: Once your people are traced onto to the puzzle, it's time to color it. I used a makeup wedge sponge and some stamping ink. I chose the sponge and ink technique (hey, that rhymed :) ) because I wanted the look of the softer edges. And because I knew the ink would still allow my carbon transfer lines to show through, especially in the lighter colors, a little less so in the darker colors.
However, if the ink did look a little too think over the carbon lines, it fixed very easily with a black colored pencil.

One thing I did not like about using the stamping ink was that it took forever to dry because the acrylic paint is not porous like paper, and so it couldn't soak it up. In fact, there were a few places there I had too much ink that it never dried. I fixed this problem in step 6, but if you are unable to do step 6, I suggest finding a different medium to color with, maybe paint or even markers. Not sure how markers work on spray paint though, never tried it.

Step 6: This step is not 100% necessary, unless your ink isn't drying. But even if your ink is drying, this step is a good finishing step to make your puzzle look better and last longer. And that would be, coat it with Clear Acrylic Sealer, (if your ink is not dry, only use the spray can kind or obviously your ink will smear.)

When I sprayed my pieces, I had taken them apart because I wasn't sure if the sealer would act the same as the acrylic paint when it dried, making them stick together. So just as a precaution, I suggest taking apart your puzzle before spraying it.
Be sure to follow the instructions on the can, and make sure you do this step out side.

When you're done and the pieces are dry, you'll have a nice, smooth, glossy coated puzzle. Another plus is that this weighs less than 13 ounces, which means you can mail it straight from your mail box. I just put all the pieces in a ziplock baggie, put it in a padded mailing envelope, used Paypal to pay for postage and print out a label, and it was good to go. It only cost me $1.92 to mail it. So add 1 dollar for the puzzle, and I already had everything else, and this was a $3 project. :)

Tuesday, February 18, 2014

Scripture Doodle - Psalm 103:12

I've completed yet another #scripturedoodle. This on is Psalm 103:12 - As far as the east is from the west, so far has he removed our transgressions from us.
Here are some pictures at different angles for you. It has a grunge effect to it, and I'm not sure if you can see it in the pictures, but there is some glitter on the background.


Saturday, January 11, 2014

Owl Always Love My Family

My sister gave me a set of 9 4x4 canvas blocks. So I had a new split canvas challenge. This is what I came up with, I hope you like it :)  I've really been wanting to do a painting with owls, so when I thought of this, I got really excited!  (P.S. hanging instructions further down.)

This is it with spaces in between each block, which is how it will be hung. It's just sitting on the floor right now.


This is it all pushed together just so you can see the painting a little better in case the pictures makes it hard to see.

This is my artistic photo :)

This shows how the edges of each block are painted a different color just to add to the whimsical look and feel of it. (Turquoise, dark purple, burnt red, saffron yellow, light green, burnt orange, light pink, light purple, aqua)

  • I didn't want to have to hang 9 individual canvases. 1. because then i have 9 holes in my wall. 2. it would take forever to get them all lined up. and 3. if i ever wanted to move them somewhere else, i have try to rehang 9 different canvases and try to get them all lines up.
  • SO, in order to avoid this, I used a strip of aluminum metal (not foil) and stabled it down the backs of each column. MAKE SURE EACH ROW IT SPACED EVENLY SO THEY WILL HANG LINED UP. 
  • The reason I used aluminum is because I first tried ribbon, which mostly worked, but then when you try to hang it, the bottom one tilts out too much, and I didn't like how it looked. So I needed something stiffer. So my dad had some aluminum strips he used for trim on the outside of our house. It worked perfectly.
  • Then we drilled holes in the top of the strips so we could hang them.

And here it is hung on the wall.

Saturday, December 7, 2013

DIY Necklace Holder

I've recently accquired several necklaces. I'm not much of a necklace wearer, or a jewelry wearer in general, so I don't have many. But I do have a handful, and I decided I needed a way to store them so that I could see them. If I can see them, I might wear them more often. And also, so that they don't get tangled. I found an idea on Pinterest, and I adapted it a bit.

The Pinterest idea was to take a hand towel bar, mount it to the wall, and then take 'S' shower hooks to hool on it, and have a necklace on each hook. I really liked the way this stored the necklaces. However, the 'S' hooks they had looked a little unsecured. They were fancy S's and they looked great, but to me it looked like it wouldn't take much to knock it off the bar. And then your necklace falls and get's tangled with itself, or if more than one falls they might get tangled together. Also, I didn't want to spend the money on a towel bar because I found that to get one that looked nice, prices started at $15 and just kept going up.

These were my supplies.

  • A 1-1/8" Poplar dowel rod cut to length, and stained.
  • A package of Shower Hooks, I chose a kind that has a deep curve so there's no chance for the necklace to fall off, and also that is a closed circle so the hook can't fall off the dowel rod.
  • A pair of wooden rod brackets (Size 1-3/8", so my dowel rod sits a little loose but it isn't bad.)
  • A pair of finials (Since I was limited on space for where I wanted to hang my necklace rod, I couldn't get ball finials, I needed something flat hat wouldn't take up too much space. So these are actually wooden toy wheels you can buy from Hobby Lobby and then I stained them.)
  • Not pictured, I needed a 1/4" dowel rod to make wooden pegs. (1/4" is the size of the hole in the wooden wheels)


Once everything was stained and cut to length, I drilled a 1/4" hole in the ends of my dowel rod, centered, obviously. I glued the peg made from the 1/4" dowel rod into the wheel so that it wouldn't come out. The peg should fit snuggly into the end of the big dowel rod, but still be removable. I did it like this because my shower hooks can't fit over the wheel, so if I ever need to add more shower hooks, or take some off, I can just remove one of the finials and slip them on/off and then replace the Finial.
But finials are needed to keep the rod from slipping off the brackets and spilling your necklaces!


I mounted my rod brackets, using a level to make sure the rod would be sitting straight. Then I put all my necklaces on hooks, doubling some over because they're so long, and I put them all on the rod. I left the hooks open because it would be rather troublesome to try to open a hook every time I wanted a necklace off, plus because I opted for the larger size rod, there isn't much extra room for squeezing the hook to make it close.
**If you use hooks similar to mine, be sure you put them on the right way with the opening facing OUT toward you and away from the wall, otherwise it makes getting necklaces off much more difficult!**
But anyway, here are some pictures. You can see how the finial comes off so that hooks can be added or removed. And I took some up close pictures so you can see the hooks are open and how the necklaces hang on them.
And yes, it's halfway hidden behind my lamp, but like I said, I limited on wall space. Also notice how my ceiling is angled? That makes for limited space too. But I made do.


So, it may not be as easily accessible as S hooks, but I know I don't have to worry about my necklaces falling off hooks, or my hooks falling off the rod. :)

Wednesday, November 27, 2013

God Bless America - Scripture Doodles

I was feeling rather patriotic of late and so I decided to do some thing patriotic. I wanted to do a series of scripture doodles that were all related, and I thought that it would be cool to do some patriotic verses if I could find any. So I did some searching and I found 4 verses that I really really liked to go with my patriotic theme. I used 12x12 canvases and did a series of 4 patriotic scripture doodles. So here they are :)


Psalm 33:12 Blessed is the nation whose God is Lord, those whom He has chosen for His inheritance.

Ephesians 6:12 For our battle is not against flesh and blood, but against the rulers, against the authorities,against the world powers of this darkness, against the spiritual forces of evil in the heavens.

Joshua 1:8 This Book of the Law shall not depart from your mouth, but you shall meditate on it day and night so that you may carefully observe everything written in it.

2 Chronicles 7:14 If my people who are called by my name will humble themselves and pray, and seek my face, and turn from their wicked ways, then will I hear from heaven, and will forgive their sin, and will heal their land.

Friday, November 1, 2013

Scripture Doodle - Galatians 2:20

Well, I cranked out another scripture doodle to share with you. While the last one took me a couple weeks to get done, this one only took me 2 days. I sat down the first day and painted the back ground and planned out all my letters and the picture and got it all read to paint. And then the second day I sat down and painted the verse and picture.
This one is different from my others. The others are more cutsey, or pretty, or scripty, or fancy, or whatever word you want to use. This one is more manly, kind of grunge or distressed looking. And it's way more simple, which is probably why I was able to do it so quickly.


Wednesday, October 30, 2013

Isaiah 40:31

I finally got another Scripture Doodle done. I've been working on it slowly for a few weeks now. I think it only took me actually 3 days to make it. But I only worked on it for an hour or so at a time, and with several days of not working on it in between. But anyway, it's done, and here it is.
It has a little more realistic approach than the others I've done, so it isn't very good, and a lot of my letters/words/lines are crooked, but I'm still happy with it. I don't think you can really see it in the picture, but the purple words are shiny and metallic.


Saturday, October 5, 2013

Bookmark Monsters!

I have a really cute project today, and it allows for a lot of creativity and variation for personal tastes.
These are book marks that you slip on the corner of the page of a book. You can make them, cute, pretty, plain, simple, or however you want. I've made 5 so far, and I'm not done, because I'm making several for my friends, mom, and grandmother, who all love to read.
I'll show you how to make just a simple patterned one, and then you can embellish and decorate and design it up however you want.

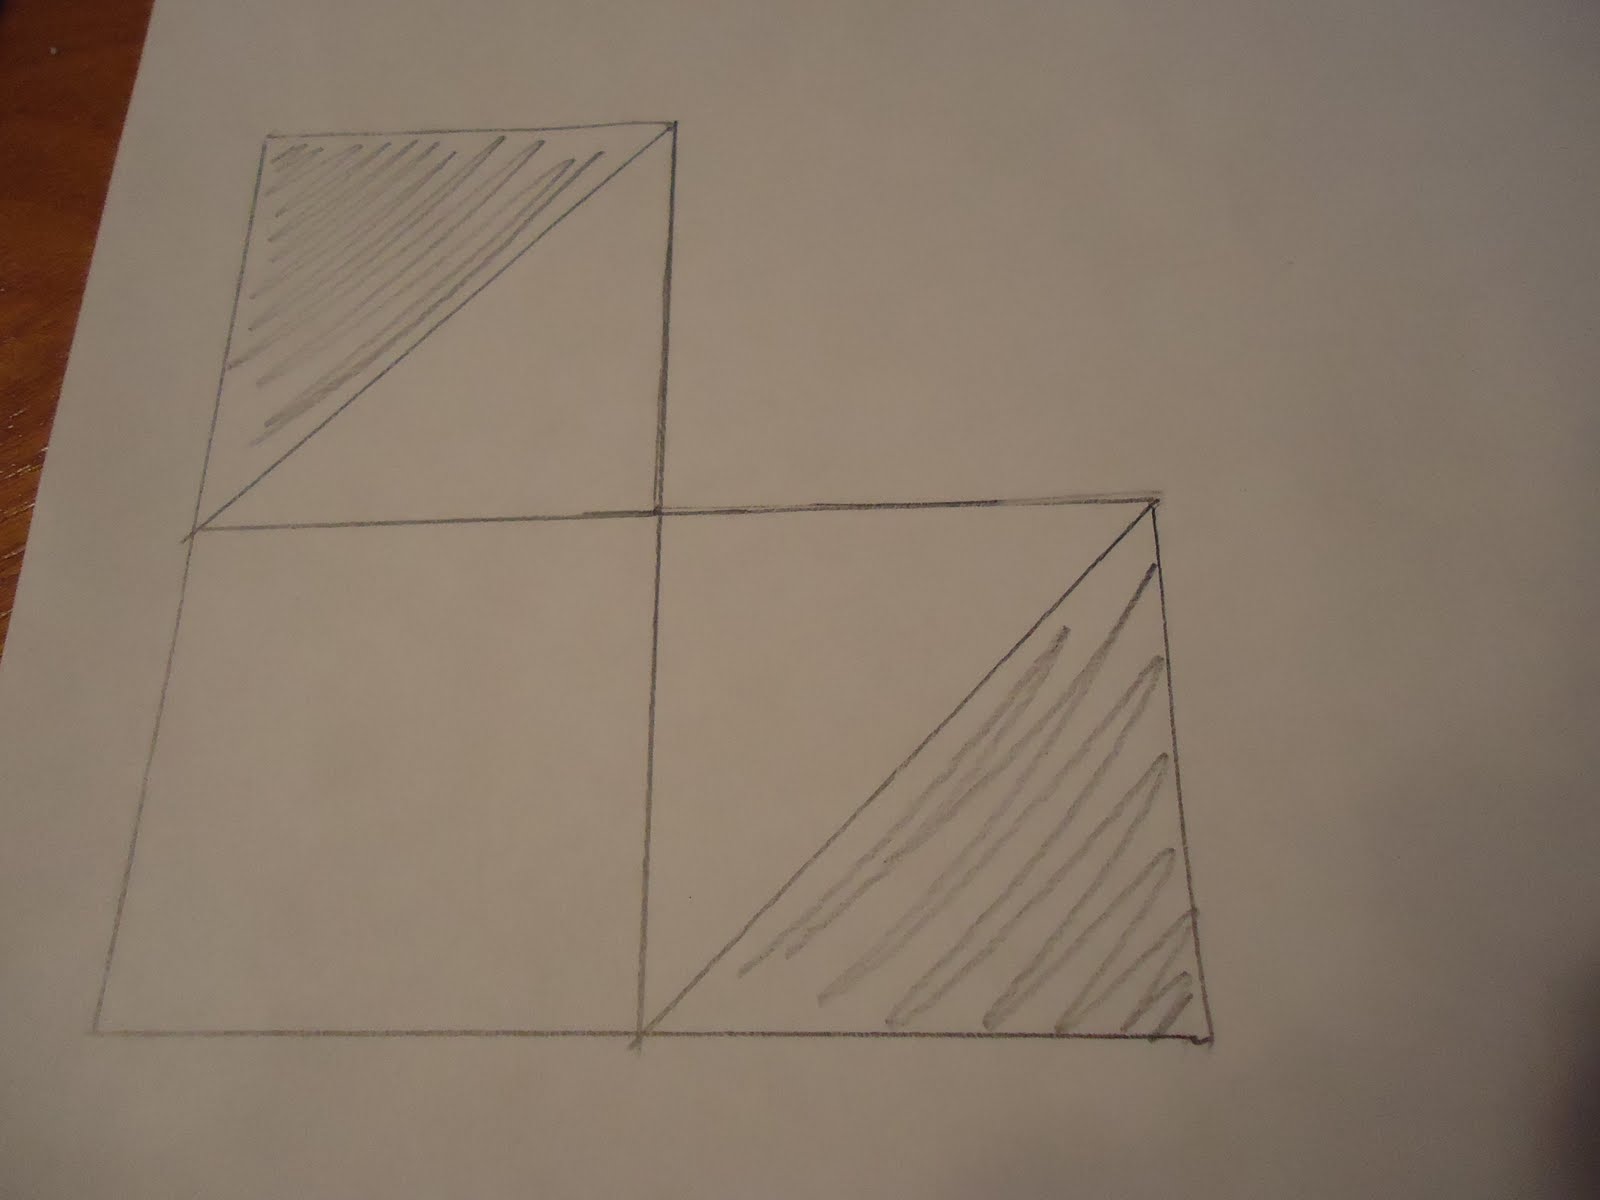
Step 1: First you need to draw a square. Then draw another identical square sitting directly on top of that one, and then another one sitting directly on the side of the first one, so that they form a L shape, like the picture below. Mine are 2 1/4" squares.

Step 2: Divide the 2nd and 3rd squares diagonally, as shown below. Be as precise as possible. Shade in the corresponding area if needed. These are the areas we don't need. Cut the shape out, cutting off the shaded areas.

Step 3: Trace the shape onto the paper you want to use as the base for your book mark. I'm using grey, because I'm using a color scheme of my friend's favorite colors.
 Step 4: Now you need to score the card stock where the lines are that divide the triangles from the square.
Make sure you score off both triangles.
Step 5: Fold the triangles so they overlap, and glue the top triangle to the bottom triangle. If you want to add a color or pattern underneath, apply it before you glue the triangles down.
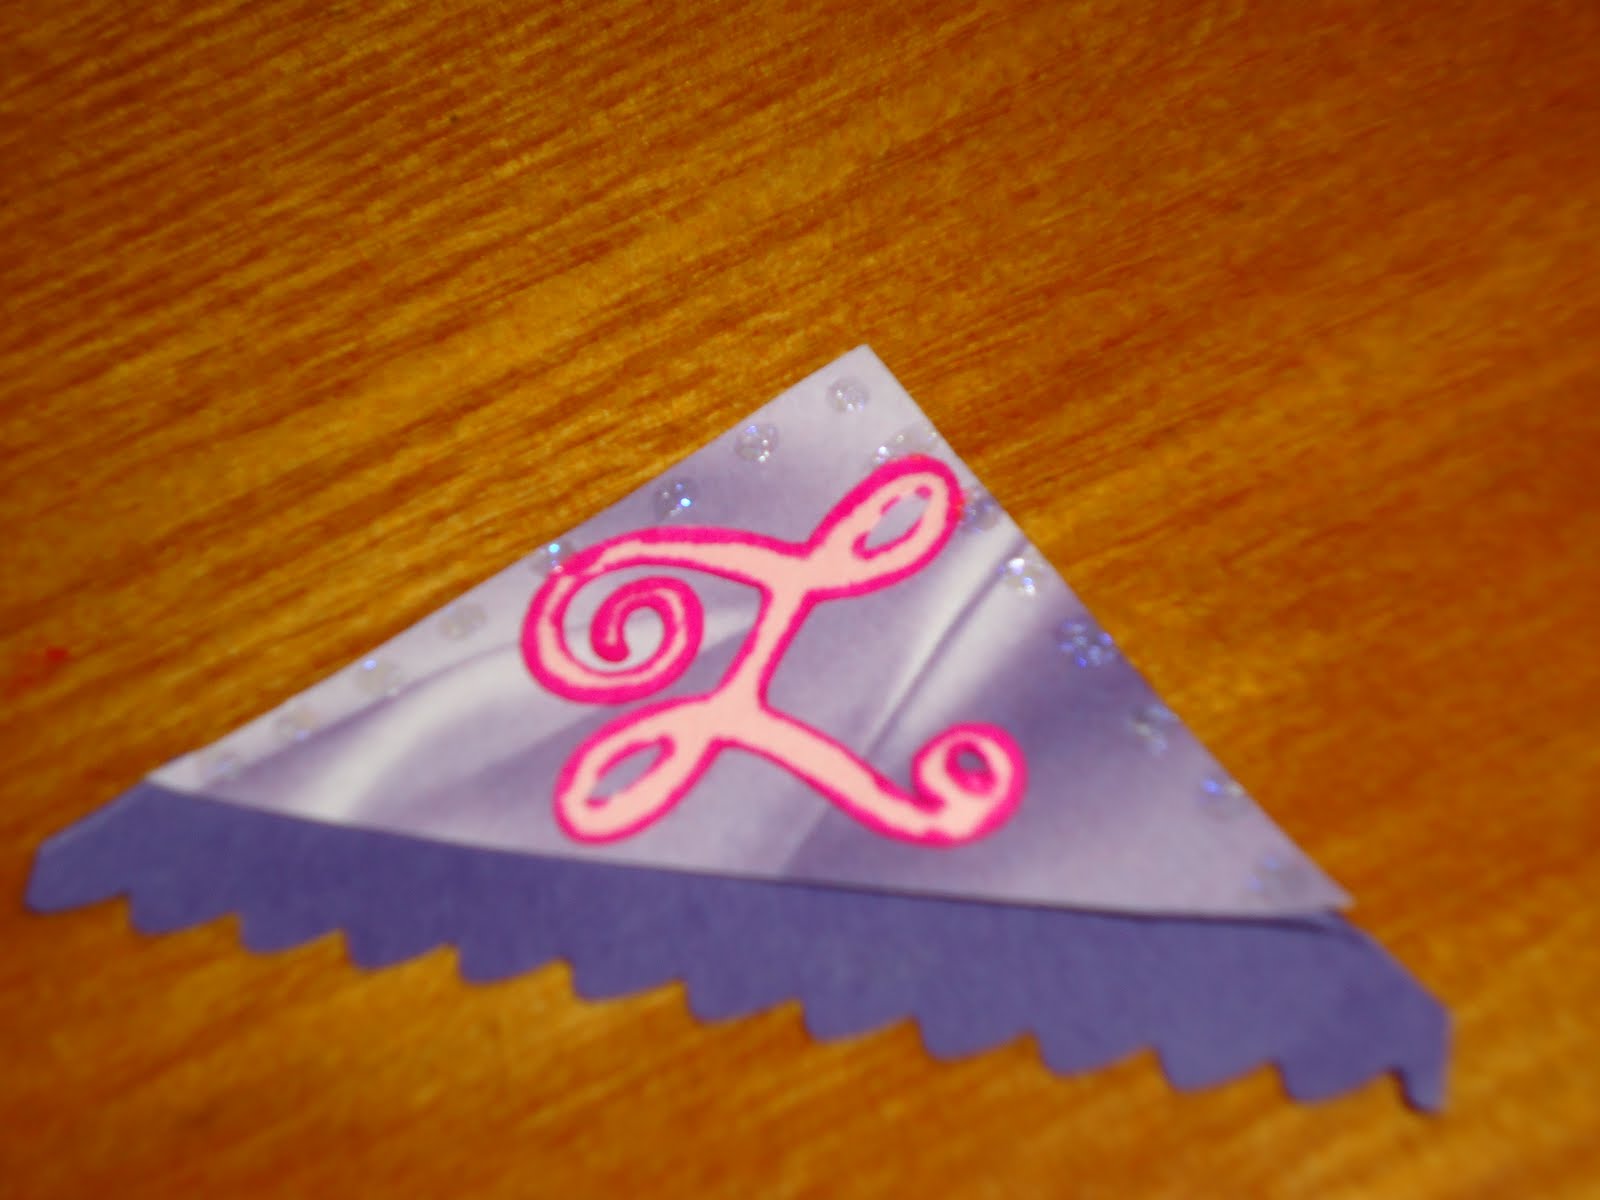
  Step 6: Decorate however you want. Here is a picture of a few that I have made. 2 simple ones, and 2 monsters.

Here is another that uses a slightly different pattern.
To get the pattern for this one, follow Steps 1 & 2 from above. The follow the following steps.
Step 3: Divide the 3rd square in half, then draw another line about a 1/2 inch below that line.
 Step 4: Erase the middle line and extend the straight lines to square off the corners, like below. Shade the triangle if you want, since you won't need it.
 
Step 5: Cut out the shape, and cut off the shaded regions. Trace the shape onto your paper, and make marks where the little triangles meet the big triangle. Extend the mark to the inside of the shape so you can still see them once you cut it out.
 Step 6: Score the paper, separating the triangles from the square. Use the marks you made as a guide.

Follow Steps 5 & 6 from above to fold and decorate.