Showing posts with label mixed media. Show all posts

Tuesday, March 4, 2014

Gift for Grandma - Count Your Blessings

This craft was inspired by a project I saw somewhere else. I adapted it to the materials I had on hand and what I could get easily or affordable. This is a failry simple gift to make that is perfect for mom's and grandma's. A mother's most joyous blessing is her children, and this gives her a way to proudly show off just how many she has.

I made two of these. One for my mom when she got her first grandchild, and one for my Meemaw. It's a home made pallet wood frame that my dad helped me make. It has routed edges to dress it up a little, and I stained it.

And then, this is where you can tell I'm a broke college kid. I took a cereal box and cut out the wide side panels, one for each frame, large enough to cover the opening of the frame. I then chose my scrapbook paper and glued it to the cereal box, and then I hot glued the cereal box to the back of the frame. So fancy. Just don't look at the back, haha.

I used my Cricut to cut out my words, and some glitter glue to dress it up. I purchased some chalkboard vinyl with an adhesive backing for the 3 panels. I purchased a box of chalk, and fashioned a chalk holder with a piece of paper and magnet to attach it to the back of the frame to always have chalk nearby.

 Then I just went to Michael's to get some plate stands to display it!


 Here is a picture of the cereal box backing. Obviously the printed side is on the inside, covered up by the scrapbook paper. And the black square is the magnet where the chalk attaches.

Monday, March 3, 2014

DIY Picture Puzzle

Several weeks ago, one of my friends from Centrikid that lives forever away in North Carolina sent me a package in the mail. It was a few silly little items that most people wouldn't mean much. But they completely made my day because of the thought she put into the package, which was to remind me of all the fun times we had a camp. Water balloons, flarp, and a rainbow colored bandana, along with a wonderfully encouraging card.

I had been wanting to send some people from camp some letters anyway, so this was perfect motivation for me to finally get around to it. I knew if anyone loves getting things in the mail even half as much as I do, then hopefully they would appreciate some snail mail.

I needed something new, exciting, unusual, and fun! So this is what I came up with. A picture of me and my friend in the form of a puzzle, and I made it all on my own! Keep reading for instructions.


Step 1: Go to the dollar store and pick out a 24 piece puzzle. You could get a 32 or more piece, but it's easiest to work with bigger pieces. I used this cute little Precious Moments Puzzle. (WARNING: The cuter the puzzle, the harder it is to cover it up in step 2!)

Step 2: Paint the puzzle white! What I did was put the puzzle together and then I tried to paint over it like it was a canvas with white acrylic paint. Let me tell you why this is not a good idea.

  1. Once acrylic paint starts to dry, it dries like a solid sheet, which means all your pieces stick together and if you try to pull them apart, it's very easy to peel the paint off one or both pieces. If you've ever gotten acrylic paint on your hands and peeled it off, you know what I'm talking about when I say it dried as one big layer.
  2. It takes a lot of paint because it's basically guaranteed you'll have to give it a second coat, which I went back and did on each individual piece rather than do the whole thing again. (I was catching on :))
  3. Because of steps 1 and 2, this takes a lot of time. Paint one coat, let it dry. Pull your pieces apart. Paint each individual piece with a 2nd coat. Let it dry. Possible have to touch a few pieces with a 3rd coat. Let it dry.
So what do I suggest? Spray paint. White spray paint. It will get a good, even, thick covering, and will dry relatively fast. And even if you do have to add a second coat, all it takes is a minute to do. I would lay all my pieces out on newspaper, NOT CONNECTED, -but make sure they are oriented correctly so you know what piece goes where, other wise you're trying to work a solid white puzzle before you can move on!!! - and spray paint them.

Once the puzzle pieces are dry, put it together.

Step 3: Find the picture you want to use. This is the one I used.

Then use a photo editing program, I used Picasa, to get a pencil sketch and crop it down. Make sure it has plenty of lines for detail.

Step 4: Print out your sketch picture in the correct size for your puzzle. Obtain some graphite/carbon transfer paper. Place the transfer paper under your picture, be sure the waxy side is face down on your puzzle, and trace all the important lines, which is anything defining in the face, hair, and clothing, and all the outline lines, of course. I'm sure you can tell that I ignored the background, I only traced the 2 people.

Step 5: Once your people are traced onto to the puzzle, it's time to color it. I used a makeup wedge sponge and some stamping ink. I chose the sponge and ink technique (hey, that rhymed :) ) because I wanted the look of the softer edges. And because I knew the ink would still allow my carbon transfer lines to show through, especially in the lighter colors, a little less so in the darker colors.
However, if the ink did look a little too think over the carbon lines, it fixed very easily with a black colored pencil.

One thing I did not like about using the stamping ink was that it took forever to dry because the acrylic paint is not porous like paper, and so it couldn't soak it up. In fact, there were a few places there I had too much ink that it never dried. I fixed this problem in step 6, but if you are unable to do step 6, I suggest finding a different medium to color with, maybe paint or even markers. Not sure how markers work on spray paint though, never tried it.

Step 6: This step is not 100% necessary, unless your ink isn't drying. But even if your ink is drying, this step is a good finishing step to make your puzzle look better and last longer. And that would be, coat it with Clear Acrylic Sealer, (if your ink is not dry, only use the spray can kind or obviously your ink will smear.)

When I sprayed my pieces, I had taken them apart because I wasn't sure if the sealer would act the same as the acrylic paint when it dried, making them stick together. So just as a precaution, I suggest taking apart your puzzle before spraying it.
Be sure to follow the instructions on the can, and make sure you do this step out side.

When you're done and the pieces are dry, you'll have a nice, smooth, glossy coated puzzle. Another plus is that this weighs less than 13 ounces, which means you can mail it straight from your mail box. I just put all the pieces in a ziplock baggie, put it in a padded mailing envelope, used Paypal to pay for postage and print out a label, and it was good to go. It only cost me $1.92 to mail it. So add 1 dollar for the puzzle, and I already had everything else, and this was a $3 project. :)

Thursday, May 16, 2013

Happy Mother's Day

Just a little DIY Mother's Day gift I helped my niece with... or rather, helped her dad (my brother) with.

So, this year was my niece's first Mother's Day.  My brother (her dad) has a good idea about making a thumb print pendant necklace for her mom. He didn't have time to do it because whenever he was with his baby, he was also with his wife. So he asked me to help him out and make it with the baby, Saylor, on the days we babysat her.
However, a 5 month old baby doesn't really have much of a thumb print, not to mention thumb. So when we tried (in both salt dough and modeling clay) it just looked like an indention. Not a thumb, or a print, or anything remotely close. So then we tries a hand and foot print. However, the modeling clay we got wasnt the right kind I guess and was too hard and didn't really work. And the salt dough just kept trying to shrivel  crack, or bubble. It seemed hopeless.
So I did a little Pin-search, that is to say, research on Pinterest, to come up with some alternatives.
This is what we came up with. I think it turned out pretty good, and he said she really liked it.
We had a little trouble, because despite the several time we practiced the painted footprint and she did perfectly, when i came time to do it on the canvas, she kept trying to curl her toes. She ended up with 6 toes on one foot, so I had to do some touch ups. Expect this to be necessary if you give this a try.

Basically all you need to do this is a canvas, some paint, a picture, and baby with feet, modpodge or other good glue, and any embellishments you want. The Pin that i saw was very simple, and plain white canvas, black works, red feet, and a picture. I decided to dress it up some, obviously. There is so much creative freedom with this project.


Tuesday, March 5, 2013

Fireflies

A split canvas painting + a bright idea!

I've been wanting to make another split canvas painting, but I wanted it to be something pretty cool. And I ended up coming up with this idea. It has a strand of mini lights that poke through the canvas to light it up! And actually, my strand had 2 settings, steady on, and flashing. The flashing would be perfect for the fireflies, except that they all flash together, so it doesn't look good. They need to be chasing lights or something.
And unfortunately, I'm by no means a great painter, so I didn't turn out quite as well as I had hoped, but considering how extremely difficult it is to paint a clear jar, I'm still pretty pleased with the results.
But basically this is a painting of a jar of fireflies that are being set free (in case you couldn't tell). The picture below shows it in regular lighting, dim lighting, and with no lighting. The thing that sets this painting apart from others is the lights, as you can see. If you want to see what I used and I how I made this, I have more pictures and details below. :)

So obviously the first step is to paint your canvas. Mine is a dark blue night sky, with dark green grass at night, and a (very poorly painted) mason-type jar of fireflies, and the fireflies flying away.


(P.S. - did i mention that painting clear glass jars is SUPER HARD???)

You need some lights!! You could use mini christmad lights, or even regular christmas lights if you want, or if you're making a much bigger canvas than me. I used Tiny Lites. My sister gave them to me for Christmas, I think she got them from Michaels.
This is what the little bulbs look like if you're wondering. These are a battery operated pack that takes 4 AA battering. You'll see the battery pack in a photo further down. (Sorry its a little blurry, my camera wouldn't focus)


Anyway, next you need something sharp. Please get parental supervision if you feel it is necessary. I used a little hook that came with my Cricut tools. You could use an ice pick, maybe ever a screw driver, though it probably isn't sharp enough. Possibly some scissors would work. A nail. A pencil. Be creative, use whatever you have laying around.
****Make sure whatever you are using to poke your holes will not make a hole bigger than your lights. otherwise they will just fall right through!!!**** (My hook was just a little too small, so i had to make each hole a little bigger to get the light to pop through. But you want it to be a snug fit so the lights to wiggle around and fall out.)

This is my Cricut tool hook.

So, poke your holes, and make sure they aren't too far apart that your lights won't reach to each hole. That would be bad :/. Also, make sure you place one as close to edge as possible on each side so that when you hang it on the wall, you have plenty of wire to reach across the small gap between each canvas. 
(Technically, this isn't a big deal, as you could just have a light bulb visible between the canvases, but I only had 20 bulbs on my strand and i didn't want to waste any. It's up to you.)

Once you poke your holes, pop the bulbs into place. Canvas is pretty tough, so don't be afraid to apply pressure to get the bulb in. Only widen the hole if you really really need too, otherwise it will be too big and your bulb with fall out or push too far through.
The back of your canvas will probably look like this. 

And on the front, the little lights should look something like this.

You should have your battery pack nestled in the outside corner of one of the outer canvases and taped securely into place like this. But also easily accessible to turn on or off or to change batteries if necessary.
(You could use a real strand of lights that plug into the wall, but then you will be limited on where you can hang your canvases, and it might look kinda tacky to have a strand of lights hanging down from it, unless you could hide it behind something.)
Next you want to tape the wire down so that when you hang up your canvases, it wont be sticking out and keep your canvas from lying flat against the wall. Also, if you have any loose fitting lights, this will help keep them in place and help prevent them from getting knocked out.

One last step that you could do if you want is to paint the wire that will be showing to match the color of your walls where you'll be hanging it, just to make it look a little nicer.

Oh yeah, and went back and used modpodge to add a little gold glitter to some of the fireflies without lights. And I'm thinking about going back with glow in the dark paint to add some to the others that don't have lights or glitter... we'll see.

But anyway, that's pretty much it!! Hope you like it and good luck if you decide to make a version of your own!! A night sky with stars would be pretty. Or even a christmas tree, lol. Be creative. :)

Tuesday, January 8, 2013

Canvas Crazy

I've been doing a lot of canvas art lately. I just needed a break from scrapbooking for a bit. So I decided to share with you what I've done. :)

Most of them are #scripturedoodles but there are couple other ones as well.
Psalm 91:4  -  This one has "real" feathers on it, and by i real i mean craft feathers. But they aren't just painted on.

1 Cor 14:33 

Hebrews 6:19 

Sing Lyrics from "I Swear" by All-4-One 

Proverbs 18:10

 Crayon Melt - Green and Brown Tree, with painted silhouette of kids swinging

News paper, modpodge, and paint. 3 piece set. Live Laugh Love

Sunday, October 21, 2012

Disney Character Canvas Collection

Back in August I posted a blog on the Mickey canvas I made combining a few different techniques I've seen on Pinterest. I made a whole collection of them, making one for each of the 6 main Disney Characters (Mickey, Minnie, Donald, Daisy, Goofy, and Pluto). I realized I never posted pictures of the others, so here they are. If you want to know how to make them, click here.


 (Goofy has a bit of an Orange tint when i took the picture. not sure why)


Here is where I hung them up in the game/craft room at my house.

Sunday, August 12, 2012

Mickey Character Canvas

So I'm kind of an a Disney spur right now, in case you can't tell. And I love Mickey Mouse. And I had this canvas laying around that I haven't used, so I decided to make a Mickey Mouse Canvas. I sort of came up with this idea by combining several things I've seen. I'm sure someone else somewhere in the world has done this before, but I haven't seen it, so I just sort of had to experiment, not really knowing how it would turn out. So there are some flaws that I now know to look out for if I decided to make any more of these.

Here is what my finished project looks like, and the step by step details are below:

Supplies:
Canvas
Comic book pages/comic strips/newspaper
paint and brush
water color paints
modpodge/clear acrylic sealer spray
temporary adhesive
scissors

Step 1: Find your comics or newspaper. Either will be fine, but since I did a cartoon character, I thought it would look really cool if I found comics of that character. So I just looked online and googled it and found some and printed them out. 

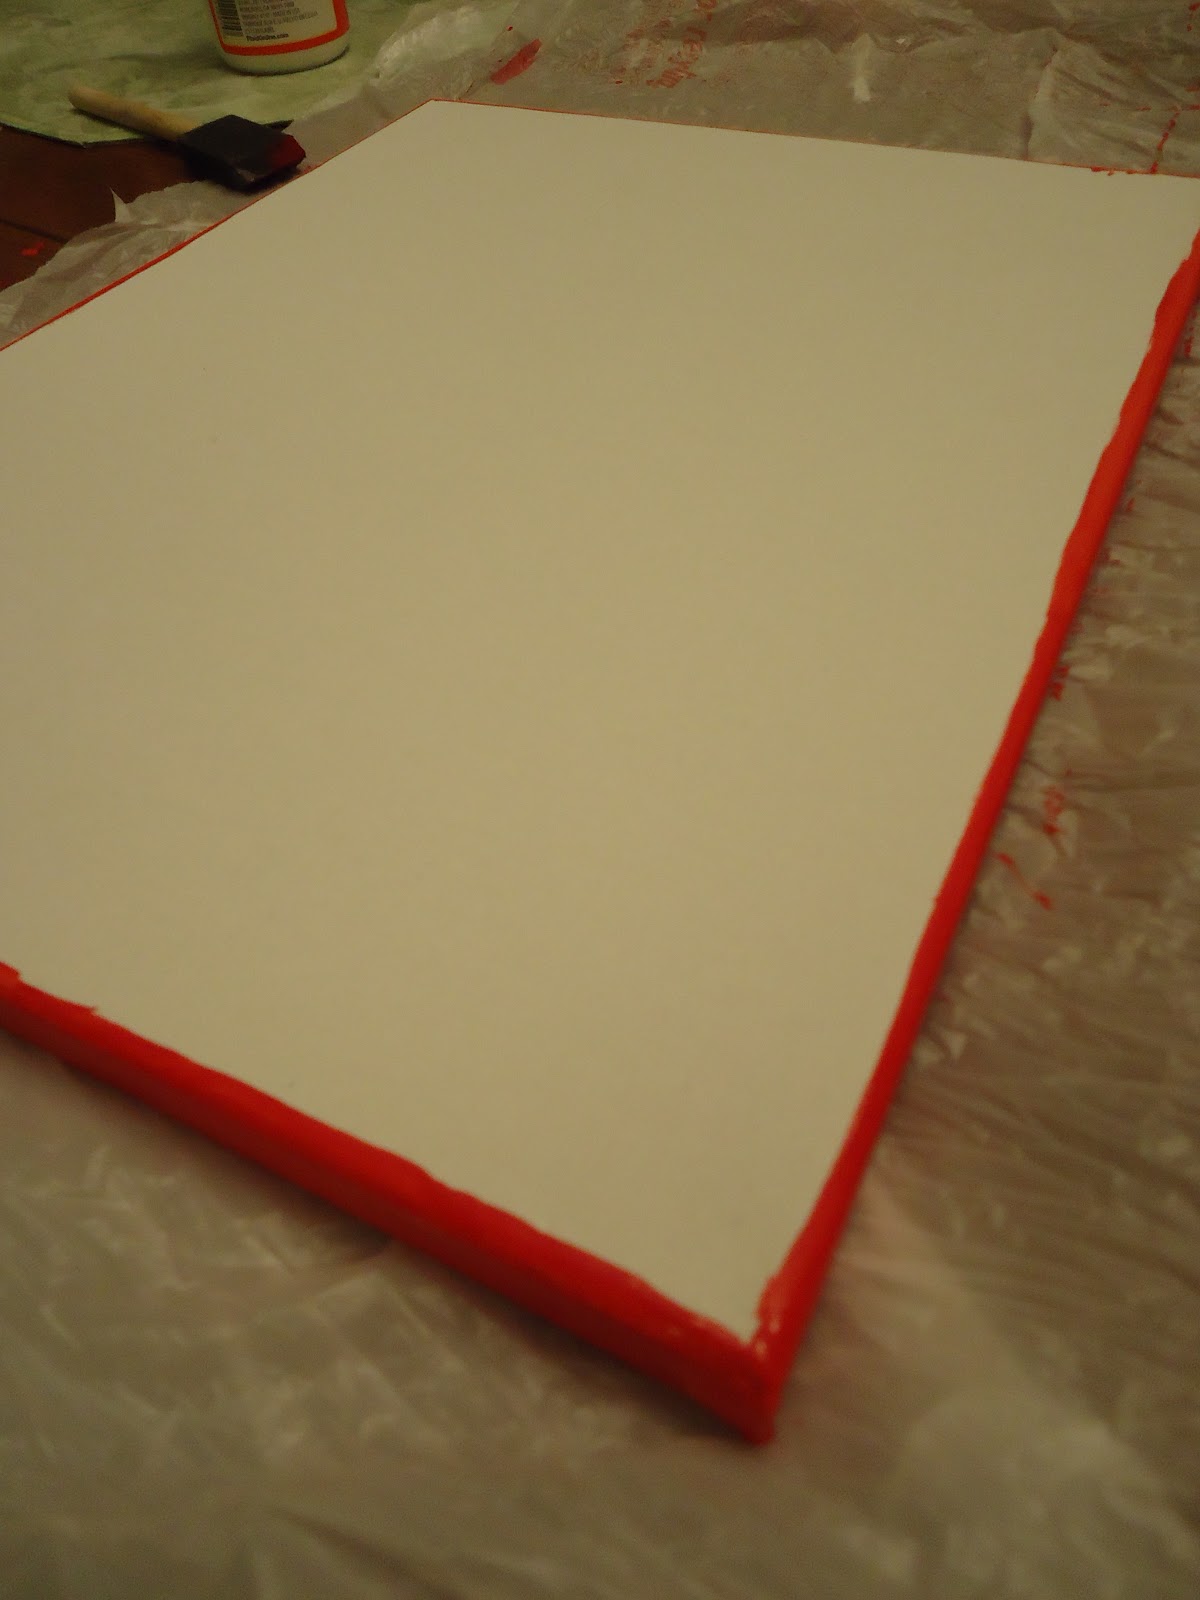
Step 2: Choose a coordinating color that matches your character and paint the edges of your canvas, and a small border on top. Red is very closely associated with Mickey, so I chose red. In this picture there isn't really much or a border on top, but like i said, I was experimenting, and I realized later I needed more of a border, so it got added after the picture was taken... probably 1/2 inch should be fine.

Step 3: Glue down the comics/newspaper. Make sure all the edges are glued down well and there are no wrinkles. I didn't make sure all the corners were glued down so after I painted they started curling up. So you're gonna wanna make sure that it's glued down well.

*****I found out that my plans of modpodging over the whole thing when I was finished wouldn't work because the ink from the paper mixed with the modpodge and left a blue haze over the comics. So I suggest testing it out in a corner first to make sure this won't happen before you modpodge your entire canvas. It doesn't show up as much in the picture as it does in person, but I just wanted to give you a heads up.

Step 4: Find the character that you want and print out 2 copies, and cut one out. You'll need the second copy later. Make sure it's the right size you want. I ended up blowing Mickey up so that he was on 2 pages because he wasn't big enough on just the one page. 


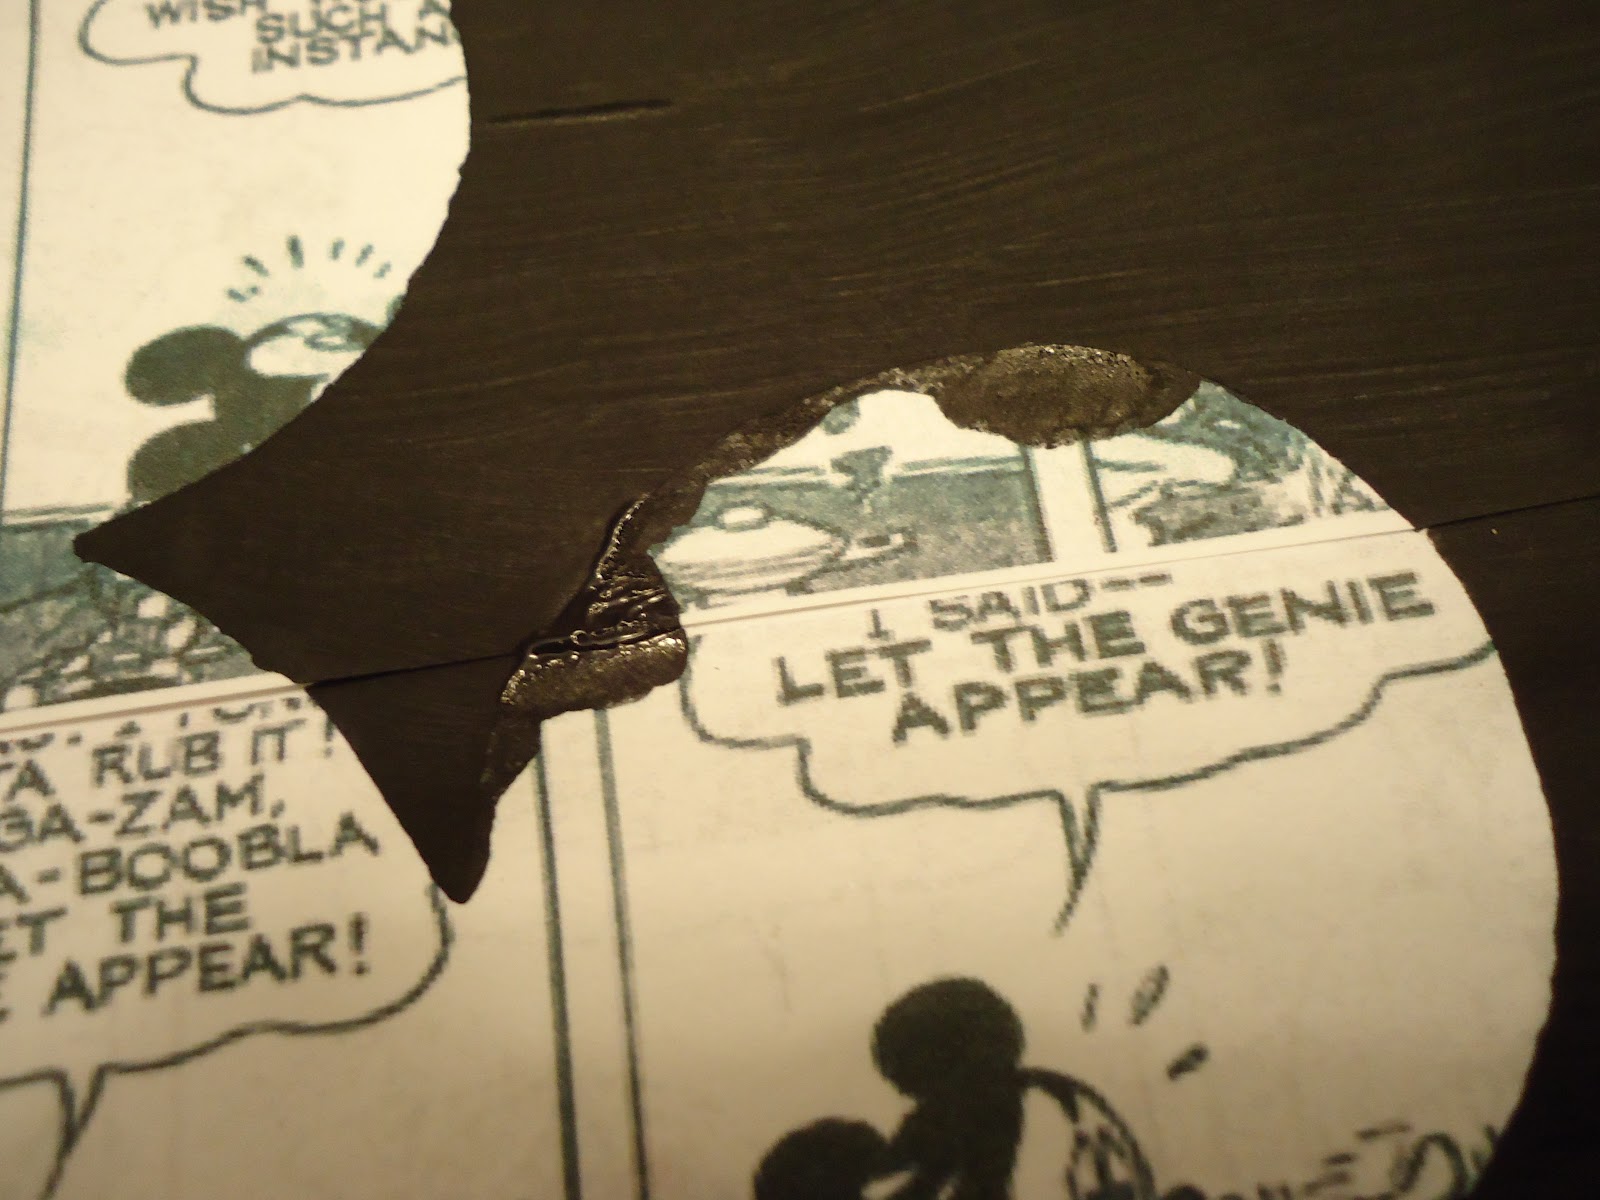
Step 5: I used this ZIG glue pen (in picture), but if you have any temporary adhesive you'll want to use that. You need to put the adhesive on the back of your character, make sure you get all the edges very well, especially at inverted and exverted corners, and any small skinny parts sticking off the main character (like Mickey's tail). If you don't, I have pictures below of what might happen that you'll want to avoid.
For this glue, it's very wet when you apply it, but if you let it dry for about 10 minutes, it's becomes tacky enough to keep the paper in place, but isn't too sticky and can be pulled up later with out any problem.

Step 6: Position your character on the canvas and make sure all the edges are stuck down well.  Then use black paint (or if you want to use another color) to paint your canvas. On the edges of your character, make sure that you stroke from the middle out, so that you don't accidentally push any excess paint up under the edge. We want crisp edges.

Once the whole canvas is painted, allow it to dry, and then peel off your character. It should look like this!!


******Here are the pictures of what will happen if the edges aren't glues down good enough or if your brush strokes go from the canvas onto the character, rather from the character onto the canvas.


So watch out for that!!

Step 7: Time to fill in the lines to define your character. Here is where you need the 2nd copy, unless you're are really good at free handing or are very artistic, you might need to use the light..But otherwise You also need a very bright light/lamp to put behind the canvas. Line up the paper with the painted outline, and I used  sharpie pen to trace the lines. You can use pencil or pen or whatever. Try to be accurate. Then go back and paint over it.

So you should have something like this now.


Step 8: I decided that i wanted to add a little color, so I used water color paints to color it in, that way the comics can still be seen.


 Stap 9: And then since I wasn't able to modpodge it, I used clear acrylic sealer spray to coat it to give that finished glossy look :)


Let it dry and you're done!!

Too see all the characters I made, click here.  (Other Characters are Minnie, Donald, Daisy, Pluto and Goofy)